Refashions

Help to Fix and Prevent Scratched Rhinestones in Jewelry

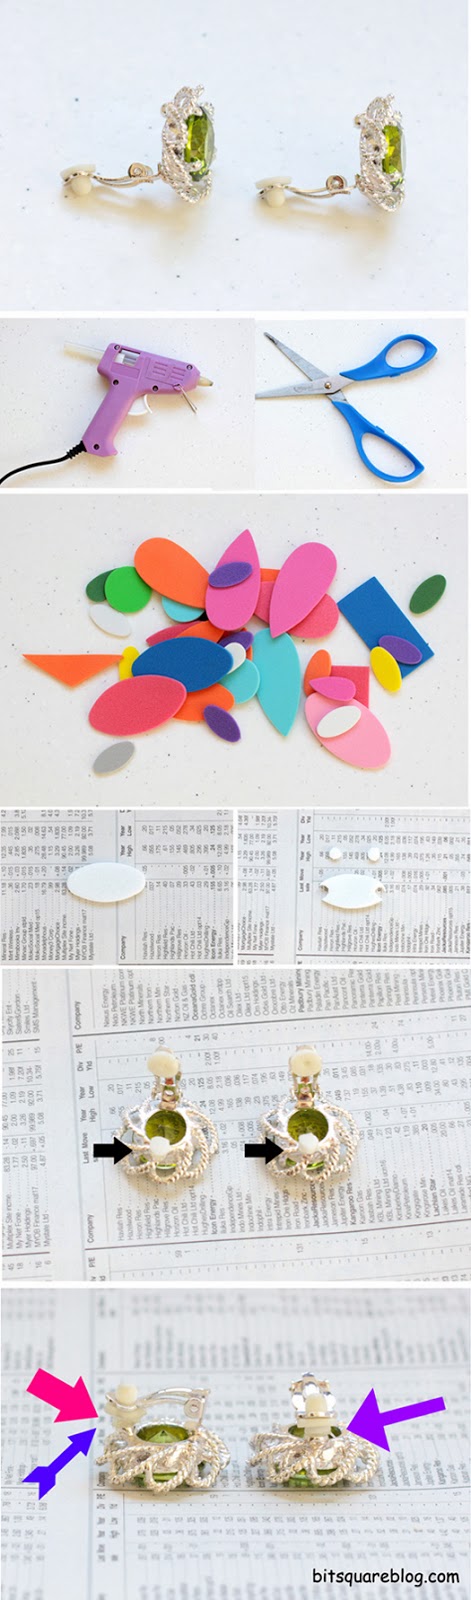
I bought these lovely earring from Lovisa the other week (they were only $3 too!) but was somewhat disappointed to discover that one of the sparkly crystals had a noticeable scratch in the silver backing. Normally I just ignore chips as much as possible and do my best to prevent them by being extra careful with my jewellery but then I had the thought – that in perhaps painting the back with silver nail polish it might not only be able to mask the hole but also prevent it from further damage too.
You will need:
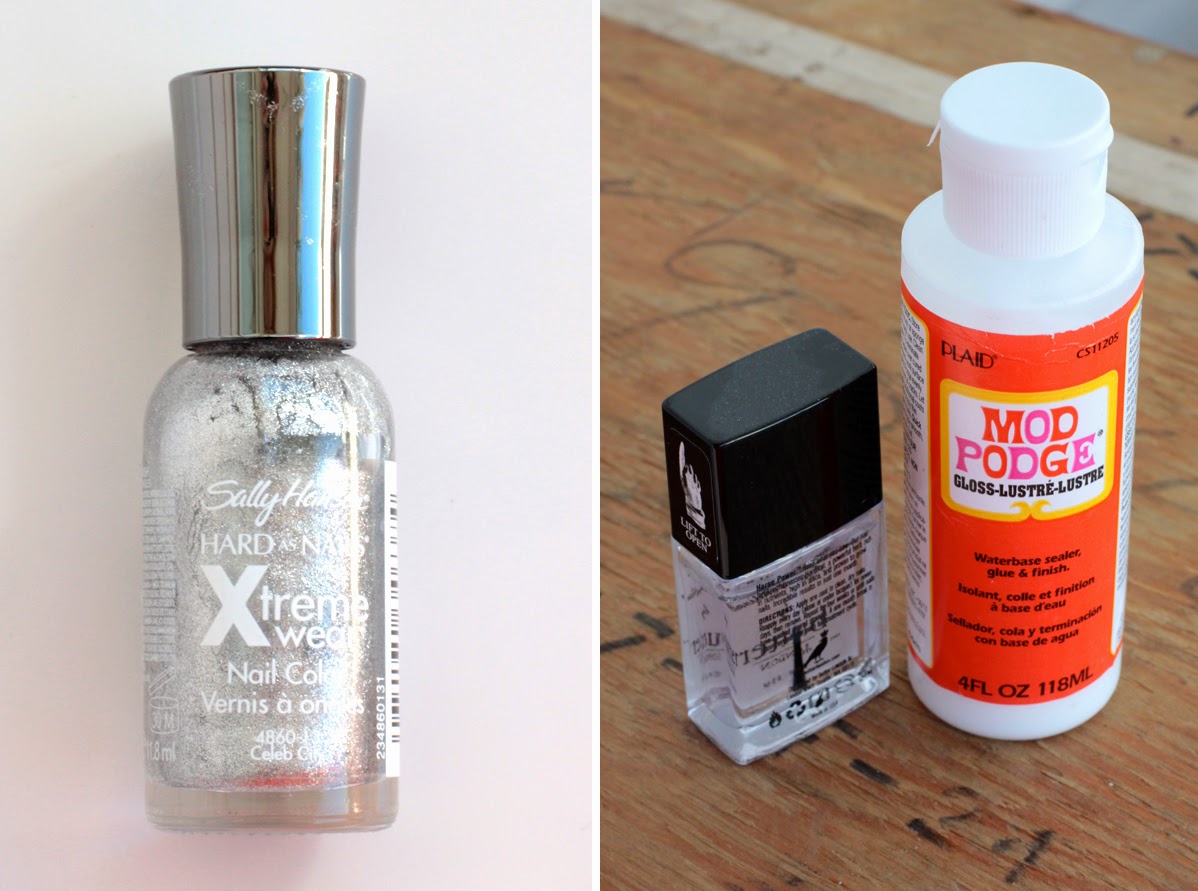
1. Silver Nail Polish to coat small scratches
2. Clear Nail Polish, Mod Podge, jeweller’s resin or jeweller’s glue to Protect other Crystals
Here you can see I filled the chipped crystal but dotting in a small amount of silver nail polish.
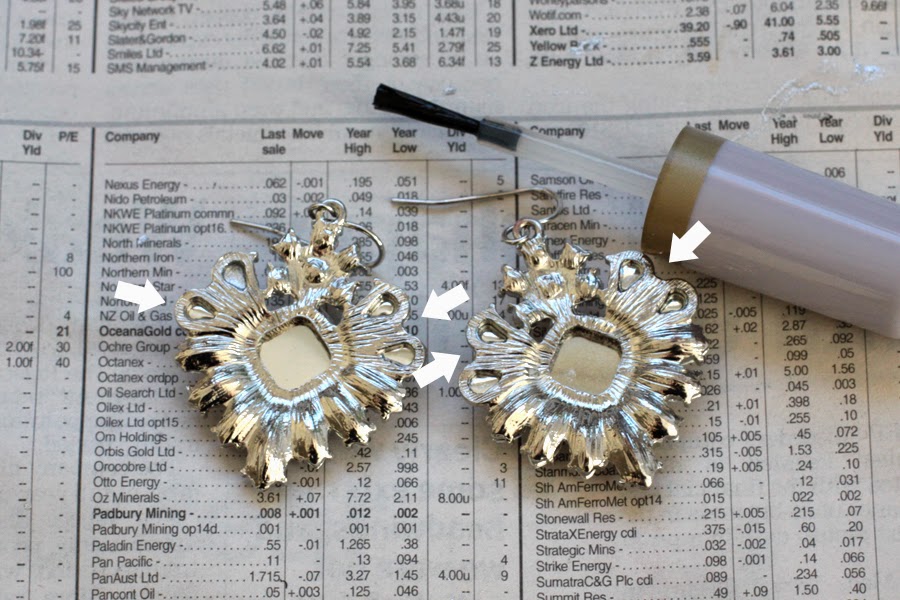
I then painted all the remaining holes with clear nail polish and let it dry.
(I think something like Mod Podge would work well here too, also jeweller’s epoxy resin)

This is the finished earring. Although the silver doesn’t blend in perfectly with the stone, I think it does look noticeably better than before. 
Tip: Make sure to match the colour of the nail polish with the crystal backing rather than crystal colour. Most gems in cheap jewellery like this use silver backing, even ones with coloured gemstones. 
I also tried doing a few of my other pieces with a silver leafing pen, it looked alright, but I think the nail polish looked better. 
I’m not sure how great this would work with patching larger holes (they might be beyond saving) but could be worth a shot. 
I think the idea of preventing scratches in the first place is a really good one though, and I think clear nail polish is a really great option (I can’t imagine it would do any harm or discolour the jewellery, if you’re worried, use resin). 
Anyway that’s what I’ve done and it seems to work well. 
Have you ever fixed scratches in your crystal jewellery? How did you go about it? I’d really love to hear if you have some different ideas or suggestions. :)
Linking up with: Whims Wednesday

Purple Necklace Refashion – 1 Necklace into 2 Pairs of Earrings and a Different Necklace

I recently bought this wonderful necklace from Coles Supermarket. It’s an absolutely gorgeous colour – a deep, vibrant purple with a hint of cobalt blue. I’ve been on the lookout for a lovely purple necklace for quite some time now so I was very happy to come across this one. Although I love the design too, I found that I just couldn’t make it work for me – I’m more of a fan a larger scale, statement pieces and this one just seemed to get lost on me. I thought about taking it back but I just loved this purple so much (it was a great price too) I’d thought I’d have a go at refashioning it. 
As you can see the pieces were joined together with jump rings. These were easy to pull apart with my jewellery pliers.  (I have some more information about pliers here).
I choose to use the central piece to make a statement pendant necklace, which I simply reattached to original chain. I then took the two medium pieces and glued stud findings to the back of them with superglue (see this post for more info on how to make basic stud/post earrings). I left the little join rings on them just for now but these are usually easy to cut off with jewellery pliers (it can sometimes just leave the finish a bit sharp, which is why I left them on here – you can cover sharp bits with some more superglue though). For the last couple of small pieces I just added some earrings hooks as they had the perfect attachment (info about attaching earring hooks here).
Here are the end results:

I am absolutely in love with this necklace now!  Even though the main reason I wasn’t wearing it before was that it felt too small on me, in simplify it, it actually makes a much greater statement. I love it with a simple black tee, yesterday I wore it with a striped V-neck too. My other idea for refashioning this piece was to make it into a brooch, it would be the perfect size for that and nice and simple too. 
I also adore these studs. I love their statement size, yet they are still nice and light and comfortable to wear. I was worried that the post findings weren’t going to be large enough to stick to them (it’s best when making studs to use the largest finding possible in relation to the earring bit). They are perfect though and I’m sure I’ll get a lot of wear out of them. 
That’s it – I’m really happy with this refashion. I always love making jewellery from other bits of jewellery. It’s so fun to have such unique pieces.

If you’d like to do a similar refashion I suggest looking at Forever 21 or Target USA (or Target Australia)- they both have lots of similar styles at low prices. Ebay is of course another great place to buy cheap statement pieces that are great to refashion. 

If you like this, I have some similar refashions I did ages ago too:

Neon Orange Bracelet to Neon Orange Earrings

Making Clip-On Earrings More Comfortable

How gorgeous are these earrings!! And would you believe they were only $5 at Harris Scarfe! I know you can’t really see too well in these photos but they have a little metal bump inside them where it pinches your ears and its rather sharp! I thought about converting them to posts but it was going to be rather difficult with this style. Instead I came up with another solution – to make a little cushion to stick over the top of them. I have these little coloured foam pieces that were perfect too (I’m not sure what they are called as I’ve had them since I was a kid. I imagine you could still get them from craft stores though. Anyone know?? )
(How do you make long images like this larger in Blogger??)
So all I did was cut out two little circles from one of the white pieces of foam and glue them over the bumps – it took 2mins. They seem pretty secure  and make the earrings considerably more comfortable. I am noticing that the foam is flattening over time so I may need to replace them every so often – which really wouldn’t be a hassle at all.
Hopefully this helps! I imagine this would work with other clip-ons too. The pinch was slightly firmer after putting on the foam but the clasps on these particular ones were a little looser than usual. 
Other Options
If you’d like more help making clip-ons more comfortable I suggest looking at the Earring Doctor (I’ve never actually ordered anything from here myself but I’ve heard good things about them). They have all sorts of things such as specific clip-on cushions and clip-ons looseners/tighteners (called Clip-Kease, or Comfort Key for Clip-Ons).  I just did a quick search on amazon too and they have a few things too:

How do you like wearing clip-ons?? Do they tend to hurt your ears too?
PS: I did a post earlier about Sterling Silver Clip-Ons which I’ve found much more comfortable.

How To Change The Color of A Belt Buckle with Spray Paint

I actually did a belt buckle refashion a while back with nail polish but I thought I’d try spray paint this time.
This ended up working really well! I made sure to cover up the belt before painting with masking tape. I then did two coats on both sides of the buckle and left it to dry overnight. The next day I painted a gloss finish on top with clear nail polish (this wouldn’t be necessary but it definitely improved the finish and I imagine it will help the paint stay longer too). I also used some black nail polish to paint the stud (I used a toothpick to paint right down into the sides).
I really like how this belt looks with a black buckle. This finish is so much nicer than the one I did with nail polish too. Yay! Hopefully I’ll get lots of wear out of this now.