Hi. I’m Amelia, a waitress and art school grad from Australia. I’m a lover of fashion, food and all things DIY. I’ve decided to begin a blog in order to share some of my ideas, doings and wearings.
It’s March 16th and it’s a year ago since I wrote my first post here! So today I thought I’d share some of my favourite posts from the past 12 months as a way to celebrate the year it’s been.
Somehow this post got picked up by Buzzfeed in 27 life hacks every girl needed to know. I was so excited, I have no idea how they found me as it was early on when writing the blog and had hardly any traffic.
I hope you enjoyed looking over some of Bit Square’s first year. I absolutely love writing this blog and have loved connecting, sharing and meeting all of you. Thank you so very much for a wonderful year :)
A bit of a different post today: Homemade Cream Cheese!
Cream cheese made from yoghurt is not only super delicious but easy and fun to make too. I make it all the time at home and usually have some somewhere abouts in the fridge. It’s much fresher, lighter and tangier than the usual commercial varieties but has a similar richness and smoothness to it too. It can be substituted in any recipe that calls for for cream cheese and easily made into dips, toppings, sandwich fillings, snacks, pizzas, quiches, salads or enjoyed on it’s own. The cheese also contains all the probiotic health benefits of yoghurt and can be made with your choice of low fat, high fat, sweetened, unsweetened, goat/sheep milk or even fruit yoghurt.
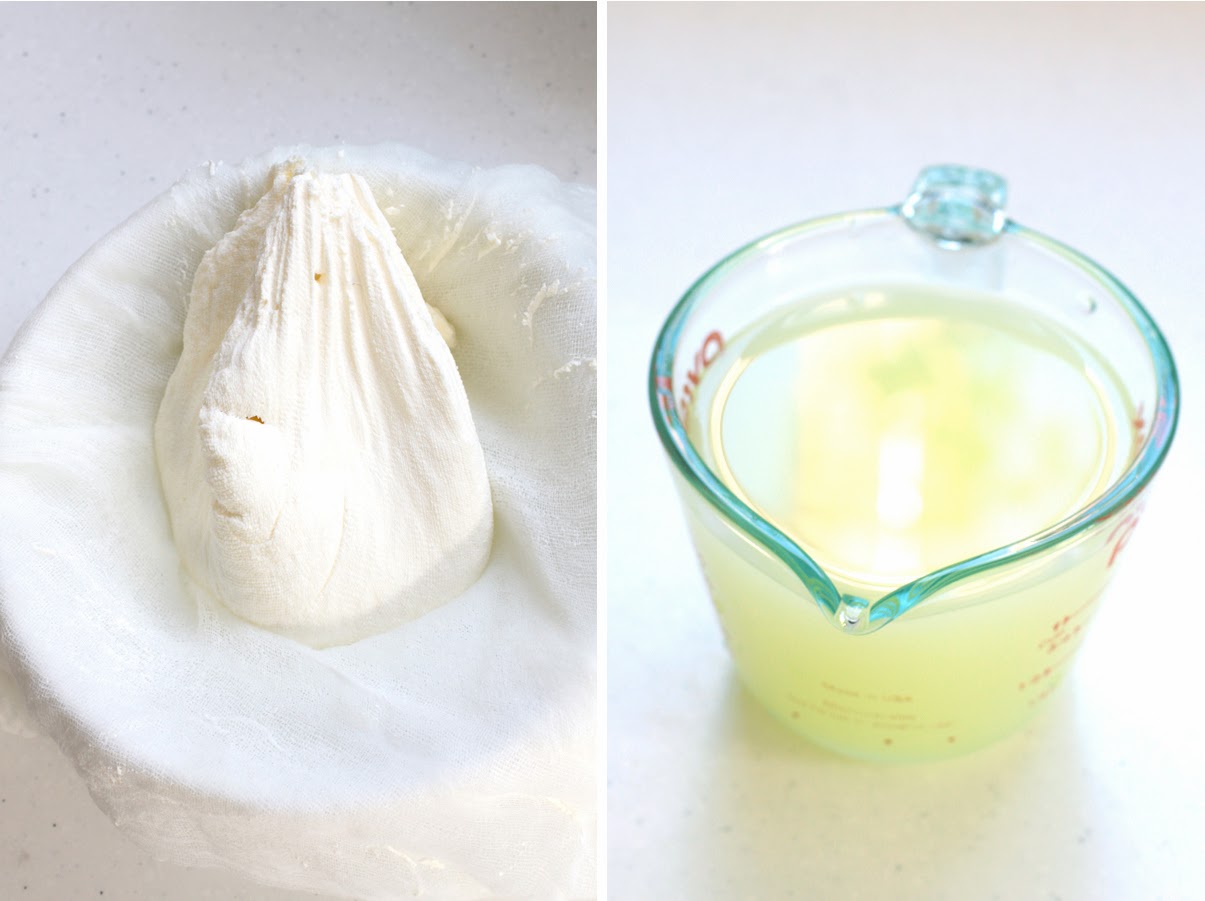
Make sure to save the whey when making this too as it’s a great, highly nutritious addition to smoothies, juices, soups, marinades or salad dressings. It can also be used to ferment/pickle fruits and vegetables, make cider (see my recipe for fresh apple cider using whey) and taken as a probiotic. If you find the cheese is too thick you can also mix back in some of the whey afterwards.
Yoghurt Cream Cheese and Whey
You will need:
1 tub of Natural Yoghurt
(Or any other type of yoghurt. The thicker types generally work best for this though. I’ve never used sweetened yoghurt myself- it will definitely work but I imagine will be very sweet so it might be best to add sugar/sweetener afterwards).
Cheese cloth (muslin) or a clean dish towel
Medium Sized Bowl
Wooden Spoon
Strong Rubber Band
6 Cans
Plastic Sieve (if you are using thinner yogurt)
Method:
1. Line bowl with muslin (doubled over) and empty in yoghurt. If the yoghurt is particularly runny you may find it easier to place muslin and yoghurt in sieve over the bowl for a couple of hours first so that some of the excess whey can run off.
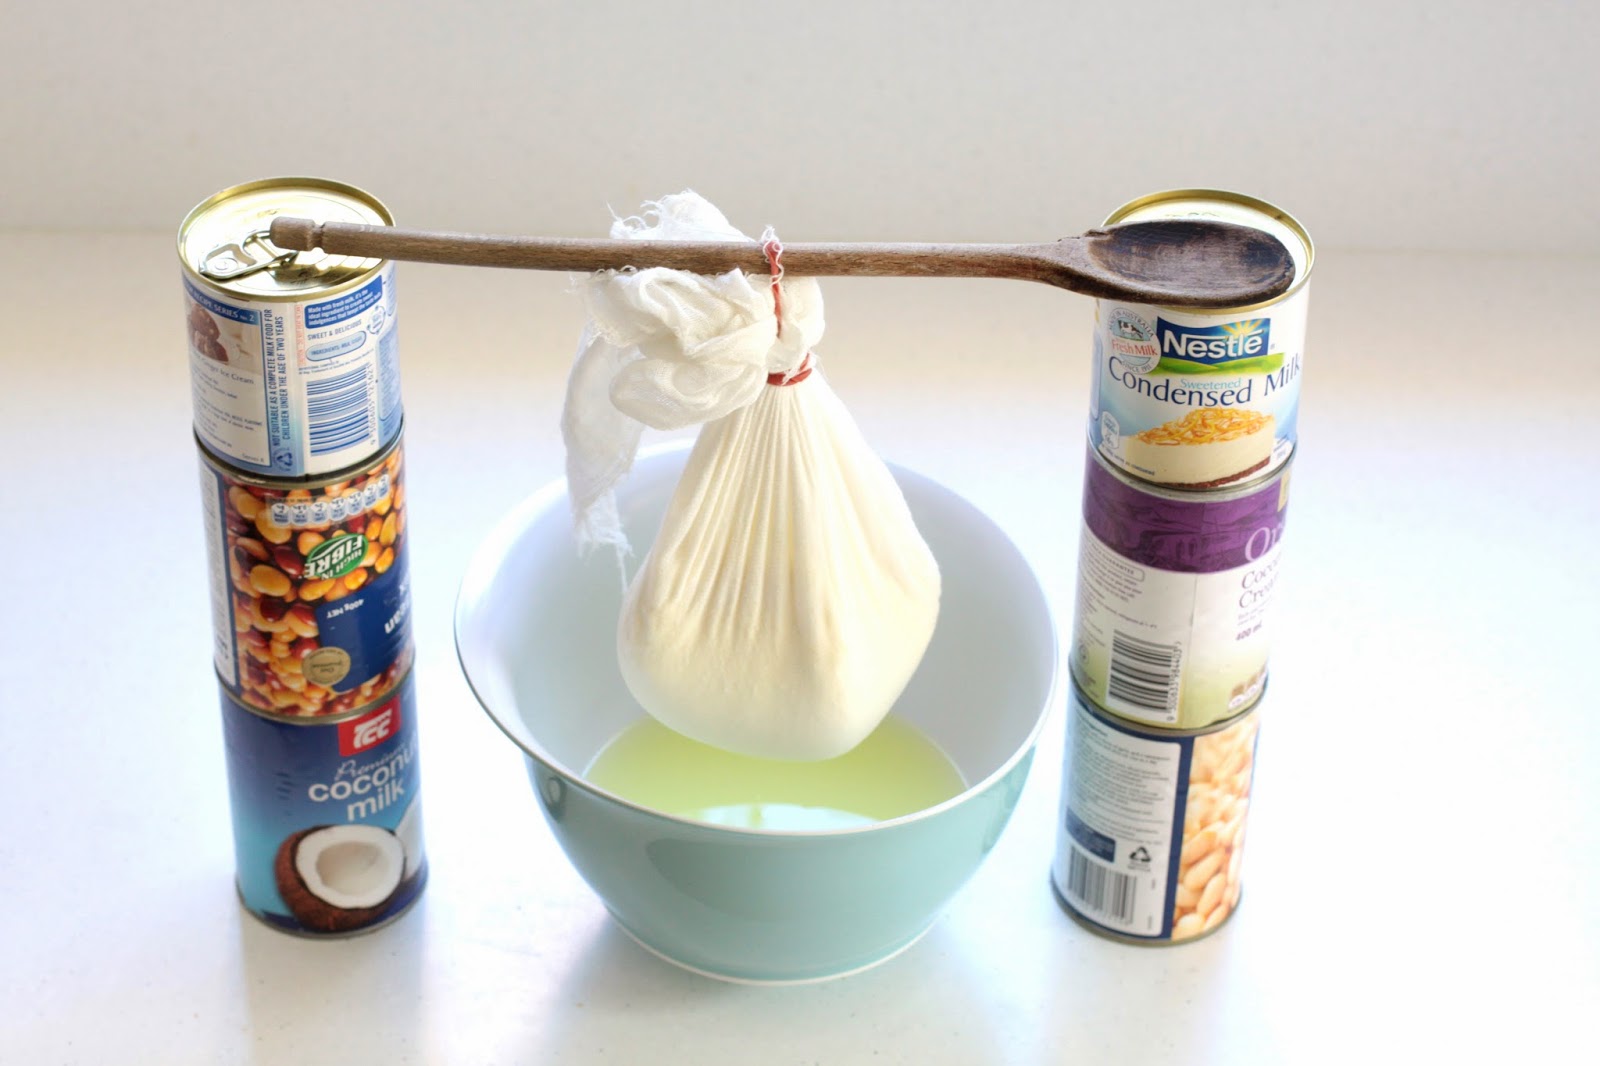
2. Tie up muslin with a rubber band and suspend over bowl using the cans and wooden spoon. The whey from the yoghurt will begin dripping through the muslin and into the bowl.
3. Leave for several hours or overnight (until the yoghurt stops dripping). I think this usually takes about 8 hours. If you like a softer cream cheese you can remove it earlier though.
4. Unwrap the muslin and the cheese is ready!
(And make sure to save the whey too – see intro for some uses)
The muslin should last for several goes at cheese making as long as it’s rinsed out and dried well. If it starts to smell or discolour (mine usually goes red!) throw it out.
The cheese should last for at least couple of weeks in the fridge.
My favourite use for this is in dips and salads. It also makes great quiches too or just nice to have on its own.
Have you ever made cheese at home? Let me know if you make yoghurt cheese and how it turns out :)
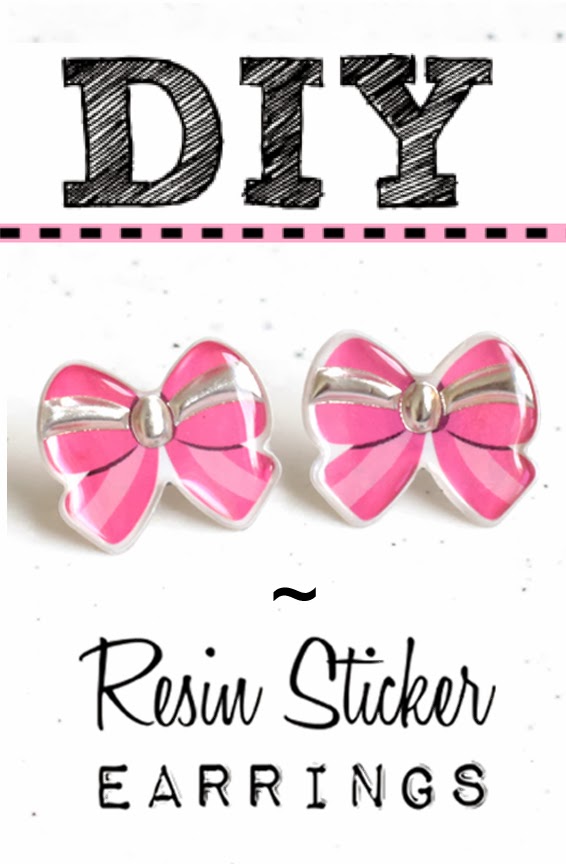
I first started working with resin about a year ago and have absolutely loved it. Although I’ve found it a little challenging at times (spillages, bubbles, resin setting too fast, or not setting at all), the results have been well worth it. So I thought it was about time I started some tutorials here to hopefully inspire you to try it out too.
This is a beginner’s resin tutorial on the doming technique. Although its reasonably easy, I suggest that if you are completely new to resin that you first try casting into moulds (just to help you get a sense of the resin). I hope to do a tutorial on that in the coming weeks (I have something coming that I’m just waiting to arrive). There are some great tutorials on youtube for beginners so I recommend looking there.
You will need:
Jeweller’s Resin, Plastic Coated Stickers (or any flat image – see note just below a bit), earring posts, stirring wands, small measuring cup, timer, rubber gloves, paper towel, plastic sheet (from display book) or a doming tray, plastic box to cover resin from dust, kebab sticks, a fine-tipped marker pen to make the measuring cup, gas mask (if your sensitive to fumes).
Purchasing Resin:
You should be able to buy jeweller’s resin from most craft shops. Most resin kits come with measuring cups and stirring wands too.
You can get it online in Australia from Over The Rainbow. In the States I know Fire Mountain Gemssells some, Amazon too. Little Windows Resin (my favourite so far) is available through their website. They ship internationally, have great prices and great service too. They also have the most amazing resin supplies.
Certain Resins can give off toxic fumes, so you’ll need to work in a well ventilated area. If you’re working outside you need to make sure that your work surface is completely flat and that nothing will blow away. I personally find it too difficult working outside. Wearing a gas mask can help and even some clear glasses if it irritates your eyes too much. One of the reason why Little Windows Resin is my favourite is because it’s non-toxic and really doesn’t give off any fumes at all. It uses less chemical hardener, and doesn’t contain solvents or the usual nasties. It also gives the best results and least amount of bubbles than any resin I’ve tried.
My Set Up:
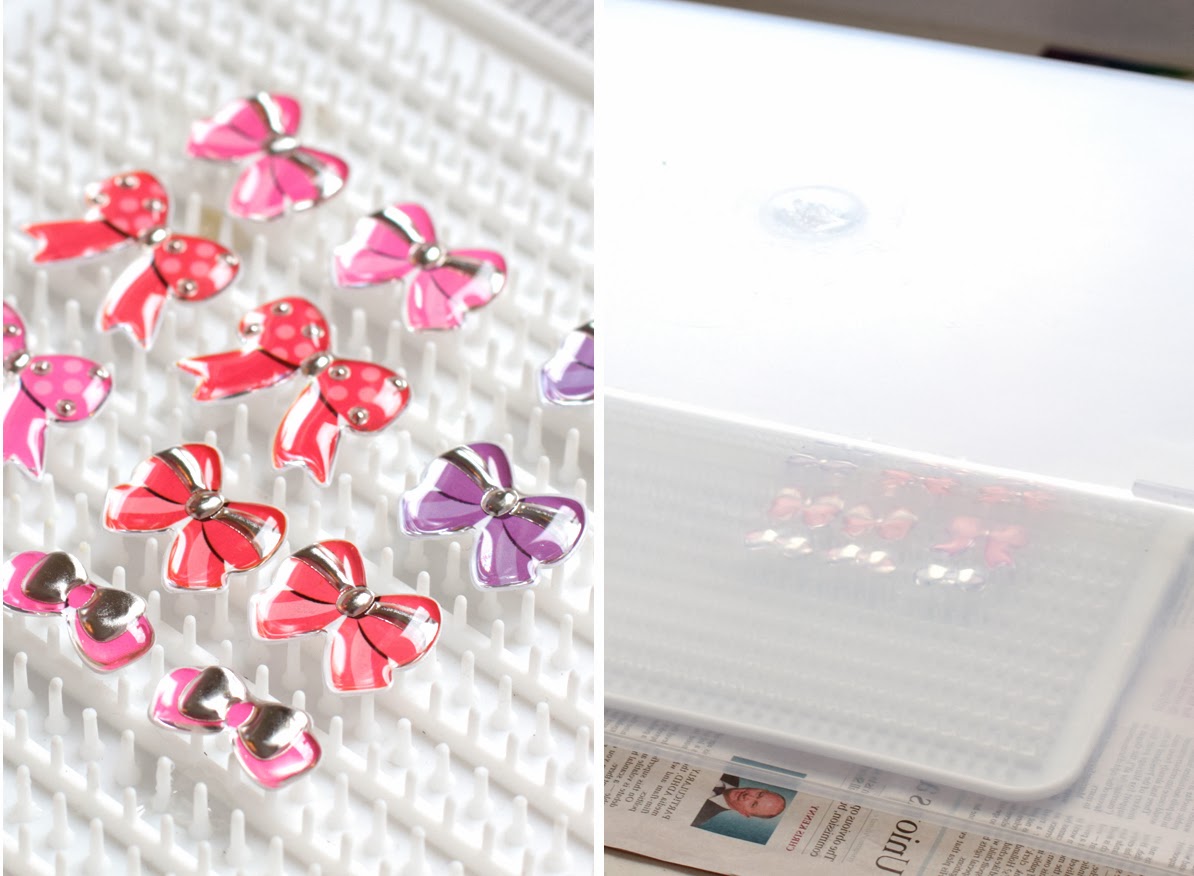
When working with resin I find it’s really important to have everything in place before you start. Once you’ve mixed up a batch you’ll have approximately 20-30 mins working time – so you need to move quickly. Having everything in front of will really help, especially if you are just learning. This is my set-up here, if you can see I even have a checklist I use to make sure I’m completely organised! (It’s easy to forget things) Once you’ve made the resin you won’t want to move it for at least 12hours, so make sure you work in a space that you can leave it.
Instead of Stickers:
Instead of stickers you can use anything – magazine clippings, photos, drawings, paper stickers, wrapping paper etc. You will just need to coat them back and front with a couple of layers of sealant, such a Mod Podge (I like the paper one/green label best). You may need to flatten them in a book afterwards as they tend to curl up.
Instructions:
1. Place selected pieces on a doming tray or sheet of plastic (I just use an A4 pieces from a display book). A doming tray catches any spilt resin so that it won’t stick to your pieces. If you’re just using a sheet of plastic make sure to spread the pieces out (more than pictured) so that if you do spill any resin (it does happen) it won’t disturb the rest of the pieces. Take a chance to check for any dust on the pieces too, use a blower brush or a soft cloth to wipe any that need it.
2. Mark the measuring cup for both the amount of resin and hardener you’ll need according to your resin’s instructions (most resin’s are a 1:1 ratio, the one I’m using is a 2:1 though). Mix the the resin SLOWLY, if you mix it too fast you’ll get lots of bubbles. Also make sure to scrape the resin from around the sides and from the spatula into the cup every once in a while so that it’s all mixed evenly. For a small batch like this I usually mix it for about 3 mins, until the swirls disappear and the resin clears. Leave the resin to rest for about 5mins (check your exact instructions for this too). After it’s rested you can remove any bubbles from the surface with the spatula.
3. Carefully get a small amount of resin onto the spatula and let it drip over one of the stickers. The resin will form to the exact shape or your pieces. When it hits the edge, it will stop. As long as you don’t put too much on it won’t overflow. If you do have resin that overflows and you are using plastic or a lower doming tray, you will need to move the piece to a clean area of the board so that it doesn’t stick.
4. If the resin doesn’t find the edges of the stickers by itself you can encourage it with a toothpick or kebab stick.
Hopefully you won’t have bubbles, I do have a couple (as you might be able to see here). Sometimes you can lift the bubble out or pop it with the stick. Quite often the bubbles will pop by themselves after a few minutes anyway. Some resins I’ve used have had a lot of bubbles, others not so many. It can also be dependant of the temperature too and definitely how quickly you mix the batch. I’ve had the most success with the little windows resin though, I hardly get any bubbles with this one. If you do have a stubborn bubble that you just can’t pop or lift out you can try waving a lit match about an inch above the piece. The fire will draw up the oxygen from the bubble. It works well but only do this as a last retort and carefully too. I have seen resin artists that use this as well as warnings written against it (although I am yet to come across a reason why this is bad??) I have burnt and discoloured pieces in the past when doing this so that might be one reason why. If you do this just be careful :)
5. After all the pieces are done, cover them with a plastic box or container to prevent dust. Let them dry for at least a day.
6. After a day they will ready to touch. Don’t worry if they are still a bit pliable (the resin takes a few days to harden completely).
7. Set up your work area as before, make sure to have earring post findings on hand too. For the reverse side I do them straight onto plastic as the curve of the set resin makes it harder to position them on the doming tray. You should spread these out more than I have here too as it can get messy. I forgot to think about this for the photo – whoops!
8. Spread out the pieces like I’ve done here. Drip resin onto the pieces as before, using a stick to move any up to edges. You’ll probably only want a thin layer of resin for the back. If you like, you can colour it with resin dye, oil paint, glitter or mica powder. I just left it clear for these.
9. Drop a post finding carefully in the centre. Position with the kebab stick. It should stay in place. If you are worried about it moving though (sometimes they do slightly), you can always glue it in place before hand.
10. Let them to dry under the plastic box for another day.
They are ready! They worked out really well I think. I was slightly worried that the resin might seek through the sticker backings and darken the design somewhat – but it didn’t. As you can see I did stuff a couple up – the two in the front I spilt resin over so they ended up completely flat rather than domed. They they still look ok but I didn’t bother putting studs on them.
As the resin shortens the length of the studs slightly you might find you can only use the nut backs (as pictured) or smaller plastic backs rather than large, circular comfort backs. See how you go though. You can always stick the posts directly onto the backings after the resin’s dried too.
I hope you enjoyed this tutorial. Resin is really fun and definitely worth something to try out as the results are so lovely and look so professional too. Don’t be disheartened if this takes you a couple of goes – it took me ages to get consitently good results with this. If you have any questions or problems don’t hesitate to contact me, I’m always happy to help.
Have you ever made resin jewellery? I’d love to hear what you’ve created. If you try out this technique make sure to let me know how you go :)
Shopping picks for the week. I featured this Red Moschino Watch on Pinterest a few months ago but thought I’d include it here too as it’s still at ASOS and still as lovely! This sequin clutch from Modcloth is a favourite too as well as these gorgeous sterling silver studs from Bauble Bar :)
……………………………………………………………………………………………………………..
DISCLOSURE: Please note – some of these items are linked to via affiliate programs, meaning I may earn a small profit from your clicks. For more info see my disclosure page :)
I sometimes work weird hours waitressing and end up having the weirdest meal times so it’s not too unusual for me to eat by myself. Even if I eat alone, I will always try to make an effort to make something nice for myself. One of my favourite things to have is freshly made soup made from whatever vegetables and meat I have in the fridge or freezer. This chicken and vegetable soup is one I probably do most frequently.
This is a basic, anything goes kind of a recipe, you could add pretty much anything you like to it. What really makes this soup work is a good, flavoursome chicken stock, so make sure to use a quality one, preferably home-made. I buy bulk chicken frames at the local butcher for a few dollars and every few weeks or so make a big batch to keep handy in the freezer in takeaway containers. It makes nutritious, tasty meals so easy and quick to prepare.
This is my standard version of it, I actually prefer it without onion or garlic but of course you can add them if you like:
Quick and Simple Chicken and Spring Vegetable Soup
for One
Ingredients:
1 Chicken Drumstick
2 Cups of Chicken Stock
Half a Carrot
Half a Celery Stick
Half a Baby Fennel Bulb
2 teaspoons of Butter
Olive Oil to Drizzle
Parsley to Garnish
Sea Salt and black pepper to Season
You could also add:
Asparagus, green beans, corn, peas, baby spinach, kale, parsnip, potatoes, sweet potatoes, pumpkin, turnip, brussel sprouts, cabbage, beetroot, fresh tomato, zucchini, zucchini flowers, canned tomato, canned beans, grains, pasta, noodles, parmesan, garlic/onion/leek/bacon (make sure to cook these ones a bit first in butter before adding liquid), lemon juice
Any would taste great together in combination – I think its best to keep things simple overall so I wouldn’t do much more than 5 different veggies though.
Method:
1. Bring Stock to boil in saucepan and add chicken. Reduce heat to simmer, cover a bit with a lid and cook for 25mins.
2. Meanwhile prepare and cut the vegetables into 1cm (1/3 inch cubes).
3. Add any vegetables to the saucepan that need to be cooked in last few minutes – I cook carrots for about 3mins – potatoes, broad beans or kale you’ll need to cook for about 7mins (possibly more), parsnip or green beens 5mins, asparagus no more than 1 1/2 minutes. I don’t like to cook the vegetables for very long when I do this so that they retain freshness and texture, but of course you could cook them for a lot longer.
4. Remove saucepan from heat and take out chicken to rest.
5. Add butter and pour hot soup over remaining veggies that didn’t need much cooking.
6. Pull meat away from drumstick and slice into bite size pieces.
7. Add chicken to soup, drizzle with olive oil and garnish with parsley.
Season to taste.
Serve with fresh bread or toast if you like, I usually just have it as it is!
Hope you like this simple and quick lunch idea :)
What are some of your favourite recipes to cook for a quick and easy lunch?
In the last few years or so I’ve worked out a few formulas to help me pack for a vacation and also to help fill in some gaps in my wardrobe. Today I thought I’d share an earring formula that helps me work out the best choices to take.
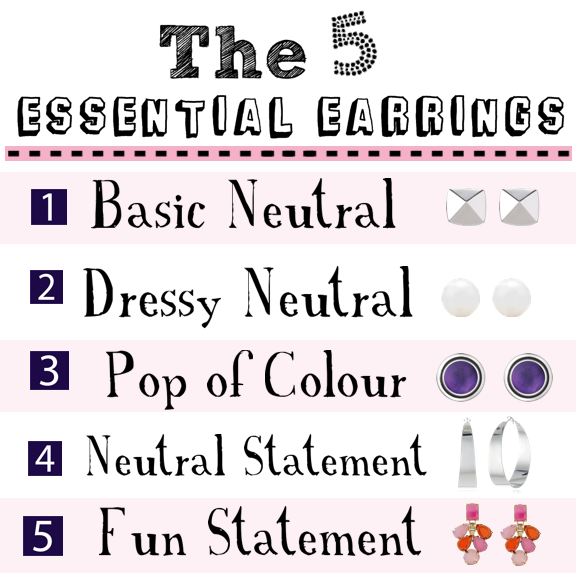
The 5 Essential Earrings to Own:
A BASIC NEUTRAL – Something simple that will go with everything, including a necklace, like a round stud or a small drop, generally metallic but not necessarily.
A DRESSY NEUTRAL – Another simple earrings but a little bit more dressy such as a pearl or something with some sparkle, usually a post earring.
A POP OF COLOUR – a solid pop of colour of a favourite colour, something that will go with the majority of your wardrobe. These are usually a statement post or a single beaded earring.
A NEUTRAL STATEMENT – A larger neutral earring, usually metallic too, that is fairly simple such as a hoop, tassel or disc.
A FUN STATEMENT – An earring you love wearing just because it’s awesome, something that will make a statement on it’s own and look great with a basic tee. These can be single coloured, multi-coloured, patterned, textured, whatever you like.
A Few of My Favourite 5 Earrings to Pack:
These links just go to the stores – I can’t imagine any of these would be online still
These are a few of my favourite earrings and ones I wear at lot of. I would say I wear a basic neutral about 40% of the time. I think it’s really important to have a few great neutrals that you absolutely love, they are really the best types of earrings to invest in. Whatever colour I choose as my ‘Pop of Colour’ earrings, I’ll try to choose a ‘Fun Statement’ earring in the opposite colour i.e. a cool coloured pair and a warm coloured pair. This gives me more variety with my outfits.
I hope this is of some help.
What do you think of this formula? What would you consider as your essential earrings?


)


)
