Hi. I’m Amelia, a waitress and art school grad from Australia. I’m a lover of fashion, food and all things DIY. I’ve decided to begin a blog in order to share some of my ideas, doings and wearings.
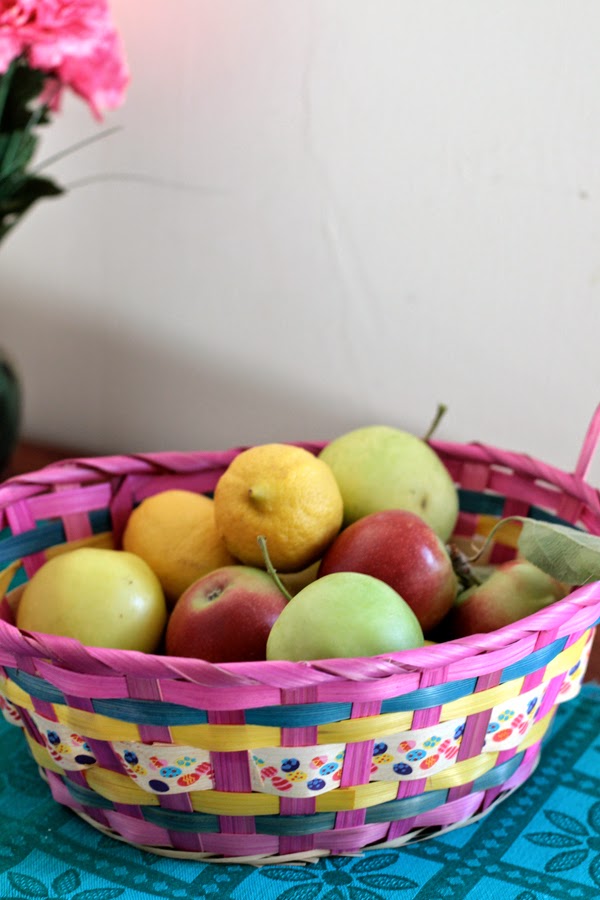
Since I’ve been blogging I’ve become more and more interested in home decor ideas. I think this is the first time I’ve actually decorated for Easter – apart from perhaps having a bowl of chocolate eggs on the table. After seeing so many wonderful ideas online though, I thought I’d stop by some local dollar stores to get a few things to brighten up my place. My budget was $20 and I was so excited to be well under that!
I always feel weird having Easter in Autumn and I didn’t really want my place to look like it were the start of spring. Instead, I tried to find Eastery sorts of designs, such as eggs, flowers, stripes, bows in richer Autumn colours like deep reds, coppers, pinks, burgundies, mustards and greens.
Red-Pink, textured flowers – I usually don’t like fabric flowers but I thought these were so pretty and appropriate. I’ll be able to make a hair tie with these too later :)
(from Shiploads)
Some large foam hearts and a striped, colourful tea-towl both in rich, warm, earthy colours.
(both from Shiploads)
It’s becoming cool enough to keep the eggs out on the bench now too.
Decorated with butterfly sequins and ribbons.
(My own supplies)
Big, colourful flower napkins, in colours like the Autumn leaves.
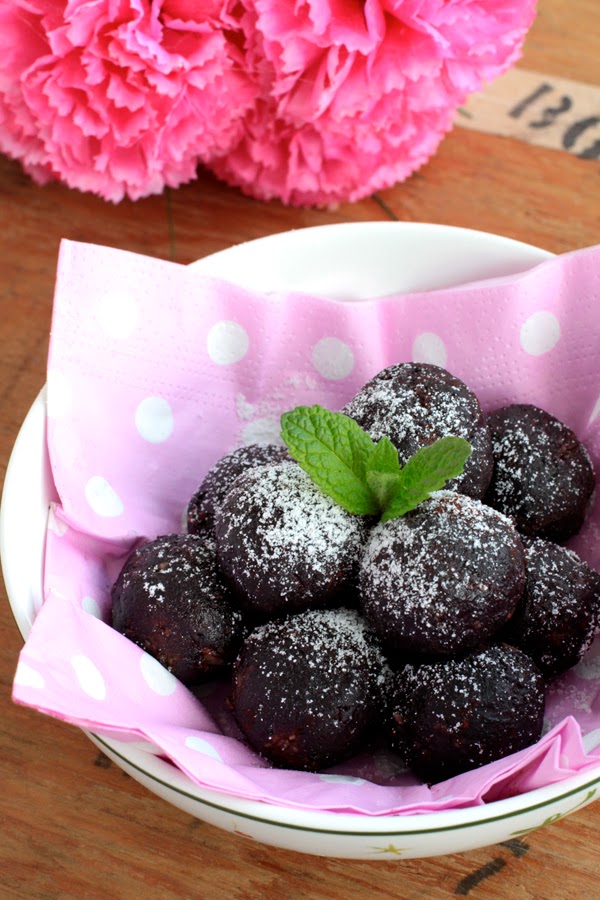
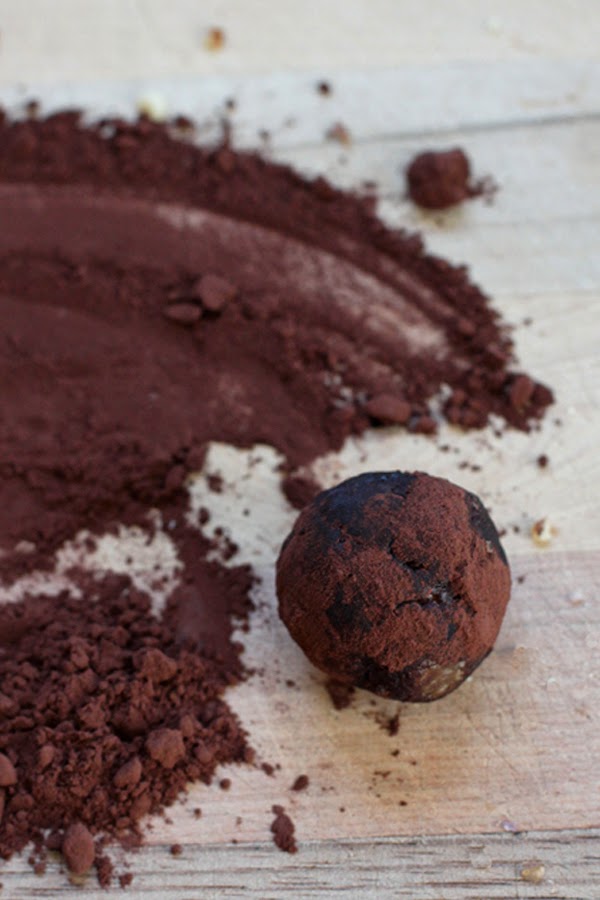
I’m not a big chocolate eater so I feel I miss out during this time of year. I love having a sweet treat to look forward to though, so when I discovered this recipe a couple of years back it instantly became a favourite. Although these are a slightly healthier alternative to a chocolate easter egg, they are every bit as yummy (well, at least to me anyway).
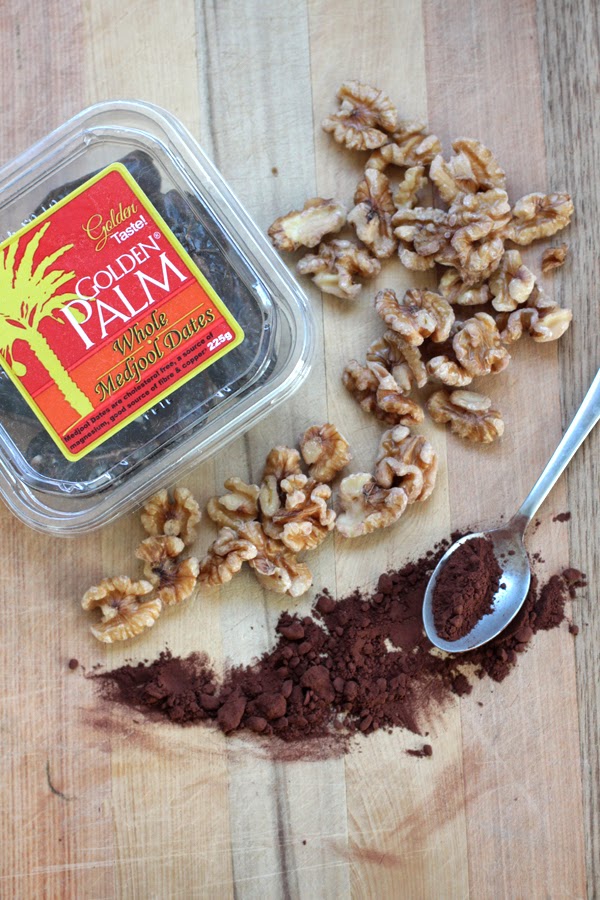
These are made from just 3 ingredients and are super quick and simple. I originally got this idea from one of my favourite cookbooks – Stephanie Alexander’s A Cook’s Companion. You can use any nut or dried fruit really but I agree with Stephanie – in that the walnut/date combination is the best.
Date and Walnut Chocolate Truffles
Ingredients:
Makes about 15 truffles.
1 cup Fresh Dates (Medjool)
1 cup Walnuts
2-3 tbsp Unsweetened Cocoa Powder
You could also use: Any mixture of dried fruits, nuts or seeds, icing sugar or dried coconut (for rolling) or dip them in melted chocolate.
Method:
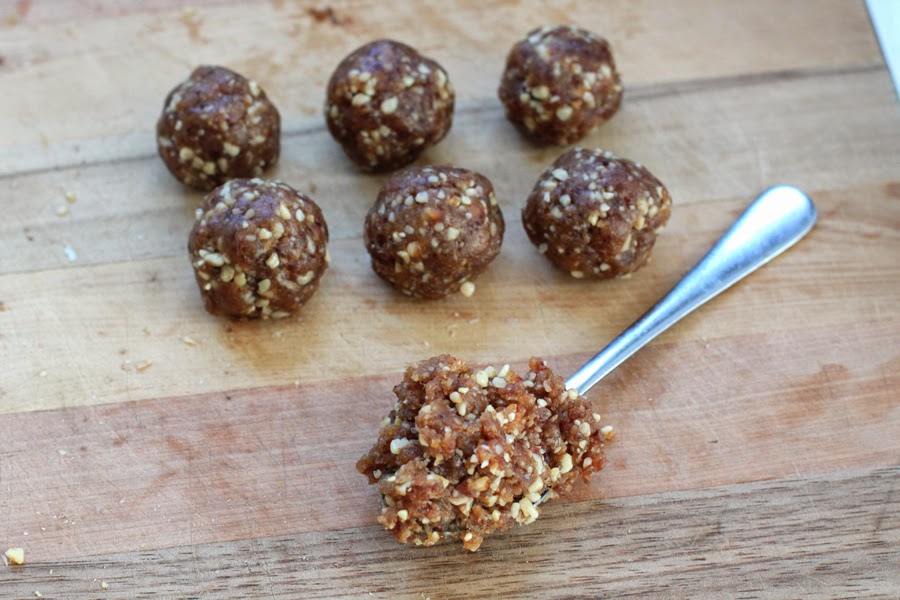
1. Remove pips from dates and roughly chop.
2. Combine with walnuts in food processor and process until nuts are finely chopped (see pics)
3. Empty contents into bowl. You made need to give it a quick mix. When I make this there are usually a lot more nut pieces at the bottom of the processor.
4. Using a teaspoon, form the mixture into balls and then roll them in the cocoa powder until completely covered.
Done.
These are best eaten straight away but keep fine in the refrigerator too. They can be a little sticky on a warm day so serve with napkins if doing so (or you can always dip them in melted chocolate too). The quantities for this don’t really have to be exact, I usually don’t measure it out and they always work fine. :)
Yum yum.
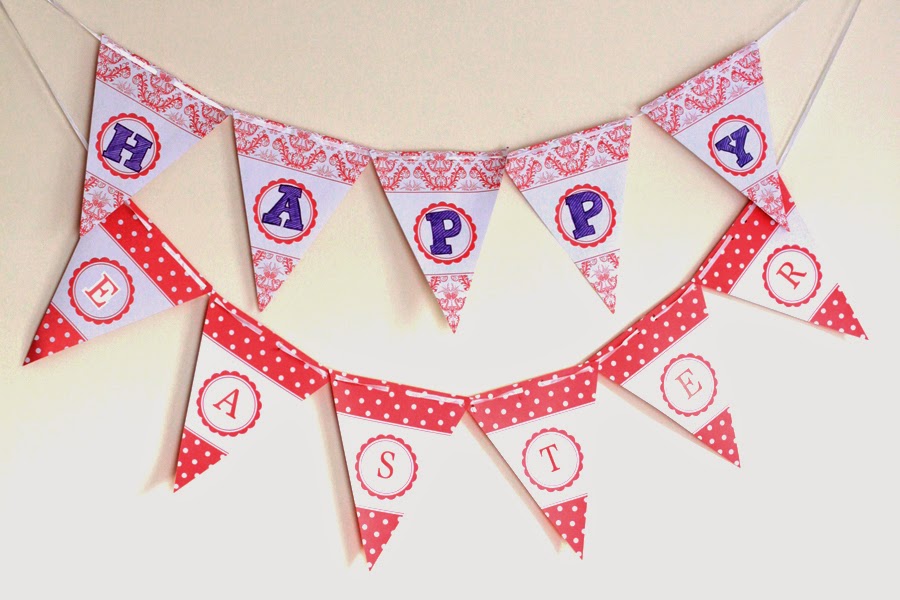
Happy Easter Everyone :) Let me know how you go making these :)
A few shopping picks for the week. I know most of you are just starting Spring but I’m very much getting ready for Autumn – so thinking scarfs and warm things! I especially love these two blue clutches from Boohoo, I couldn’t choose between them so I put them both here. I love the red earrings too, they actually match a necklace I featured last week from Baublebar :)
Please note – Some of these links are affiliated with means I may earn a few cents for your clicks. Learn more at my disclosure page :)
Do you remember my homemade cream cheese recipe I wrote a couple of weeks back??? Well I’ve been playing around with some cider making the last couple of weeks as a way to use of all the leftover whey I was making (as well as enormous amount of apples we have at the moment). This is probably one of the most interesting things I’ve ever made. It’s absolutely delicious, but completely not what I expected. It’s buttery, caramely, fizzy, sweet, salty, sharp and appley all at once. It almost tastes like it’s cooked but it has an incredible freshness to it too. The taste reminds me somewhat of a Butter Menthol. My Mum thinks it tastes like how she imagined Butter Beer to taste in Harry Potter. It’s incredibly good though and I imagine it might become somewhat of a favourite.
This is a recipe I’ve adapted from Sally Fallon’s Nourishing Traditions. It’s a traditionally fermented beverage, which relies on the production of lactic acid (the bacteria that ferments yoghurt or sauerkraut) to preserve the juice rather than alcohol. Lacto-fermented beverages used to be highly valued in traditional cultures and were also sold from soda fountains in old pharmacies as health tonics. They have several wonderful health benefits, such as being a natural probiotic, source of enzymes and electrolytes. Most importantly though they are super delicious and leave you feeling full of energy!
I’m sorry that this is going to be a bit of an inaccessible recipe, in that you’ll need to make yogurt cream cheese or have whey in order to do this. It’s totally worth it though. It’s very much something different and fun to do.
Fresh Apple Cider
(Lacto-Fermented/Non-Alhoholic*)
Ingredients:
-About 30 Apples
-1/4 cup Whey (leftover from yoghurt cream cheese recipe, also make sure it doesn’t have milk particles i.e. it’s clear, and made from natural yogurt)
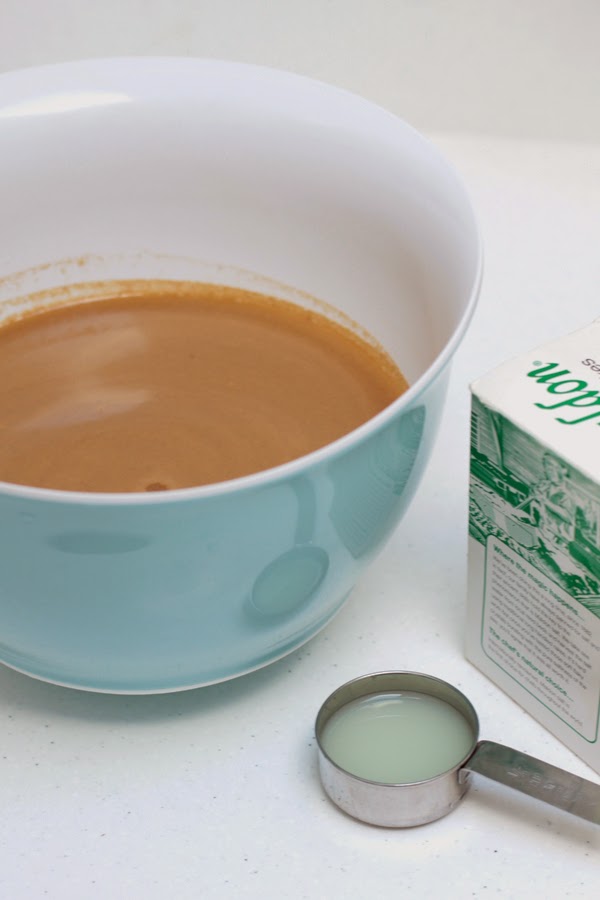
-1/2 heaped tablespoon of unrefined (Celtic, Maldon) sea salt
(My recipe here says that it’s important to use unrefined, natural sea salt but gives no reason why, I haven’t been able to find any other information otherwise. I imagine it would work ok with regular salt but that it’s not quite as good for you???)
You could also use:
2L (1/2 gallon) of commercial apple juice
1/4 cup whey
Pinch of salt (as commercial juice is already pasteurised you shouldn’t need much salt
*I wrote that this is non-alcoholic but there are times when lacto-ferments are mildly alcoholic (probably 0.5-1%). I’ve found this most with fruits, especially ripe berries and will depend on the nature of the ferment (temperature, ripeness of fruit, speed of ferment etc). So this might not be 100% non-alcoholic every time but it’s definitely a great alternative to regular cider.
Method:
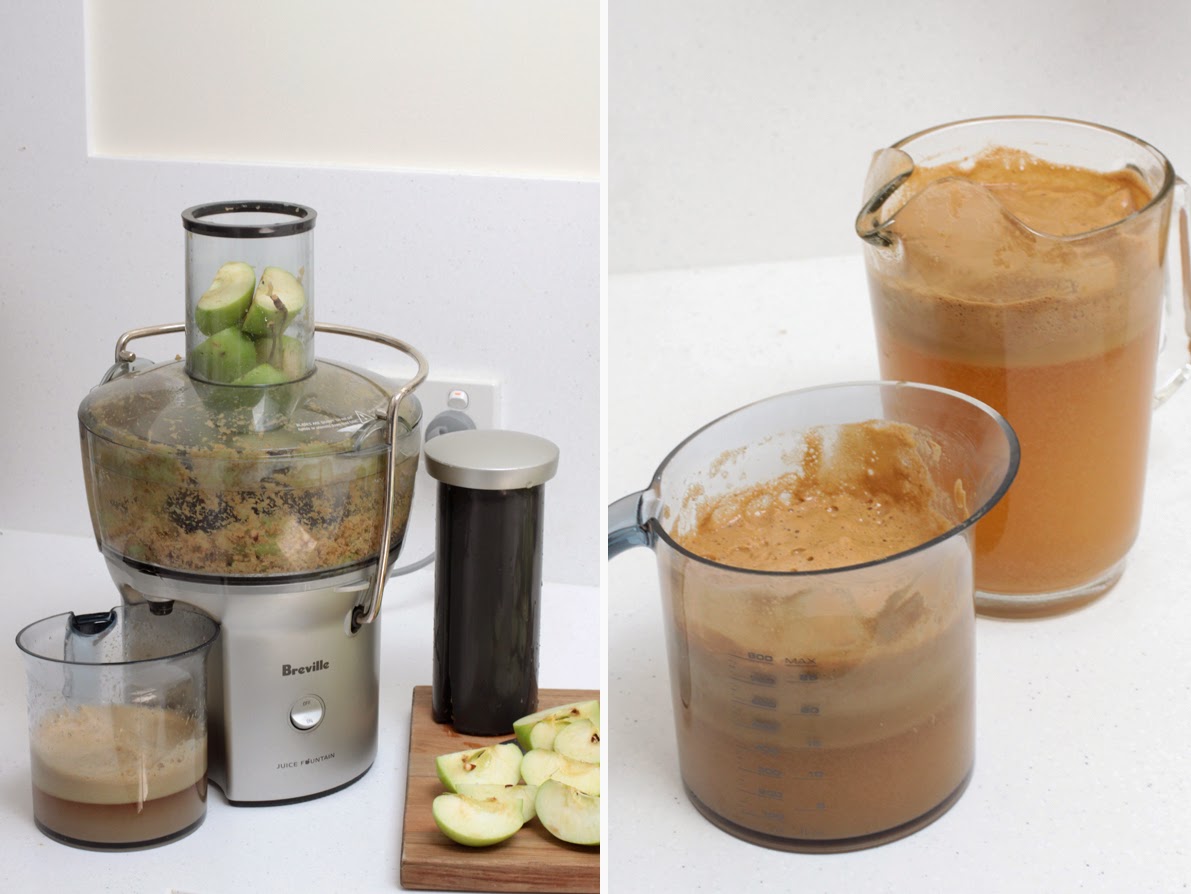
1. Wash and juice the fresh apples with a juicer. You should get about 2L (1/2 gallon) of juice from 30 medium sized apples.
2. Remove any of the scummy foam that rises to the top and strain into a large, clean mixing bowl.
3. Add the salt and whey and stir well.
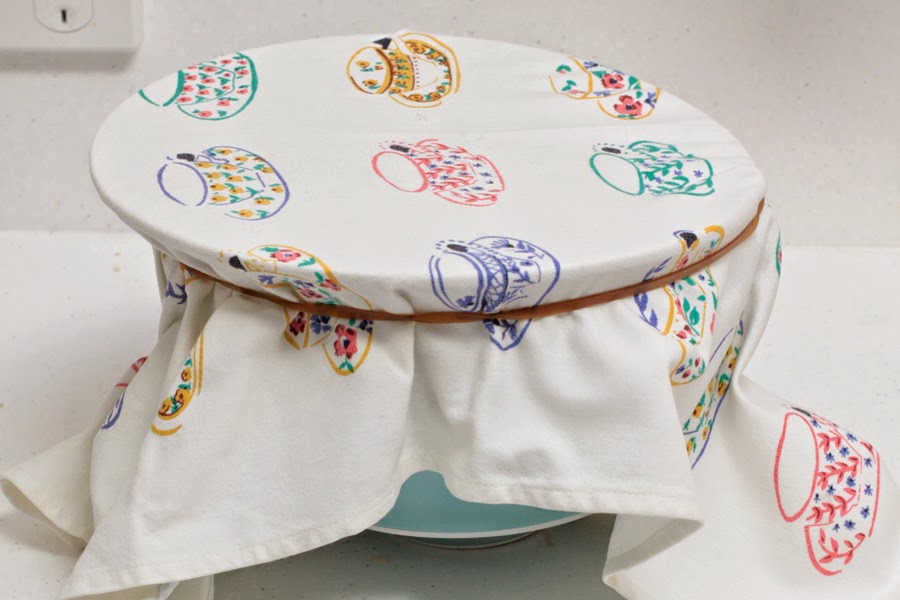
4. Cover bowl with a tea towel and secure with large elastic band. Leave at room temperature for 3 days. You can check and taste the mixture at any time. I found it quite fun to see how the taste changed and developed over each day. I stirred mine quite a lot too. It’s a good idea to check for mould after a day or so (not a good sign). This happened to me the first time I made it as I didn’t add salt. I saw small white dots of mould forming within less than a day of leaving it. If it starts to mould, it hasn’t worked and you’ll need to throw it out (I’m sorry).
5. After three days the juice will have fermented and there should be a small amount of bubbly foam on the surface. Remove as much of this as you can with a spoon, then strain mixture into 2 one litre jars/jugs/containers/bottles and store in refrigerator. There will be sediment on the bottom too. I rather quite like this and shake it into my cider but if you want to leave it it’s fine, it should stay there when you pour out the cider.
The cider is ready to be drunk straight away, although the flavours should continue to develop and deepen over several weeks. If you plan to leave it a while, store in an tightly covered bottle/jar, otherwise it’s fine in a jug!
Done! I really hope this works out for you. It took me a couple of goes to get it right. Just don’t skip on the salt or whey and you should be fine. The brown colour of the juice isn’t the prettiest of things, I wonder if adding some fresh lemon juice would help at all?? Experiment with different juices too, most should work using the same quantities and method above.
Serve with lots of ice and enjoy!
Have you ever tried making homemade cider before? If you make this let me know how you go. And I’ll be interested to to hear what you think it tastes like too! :)
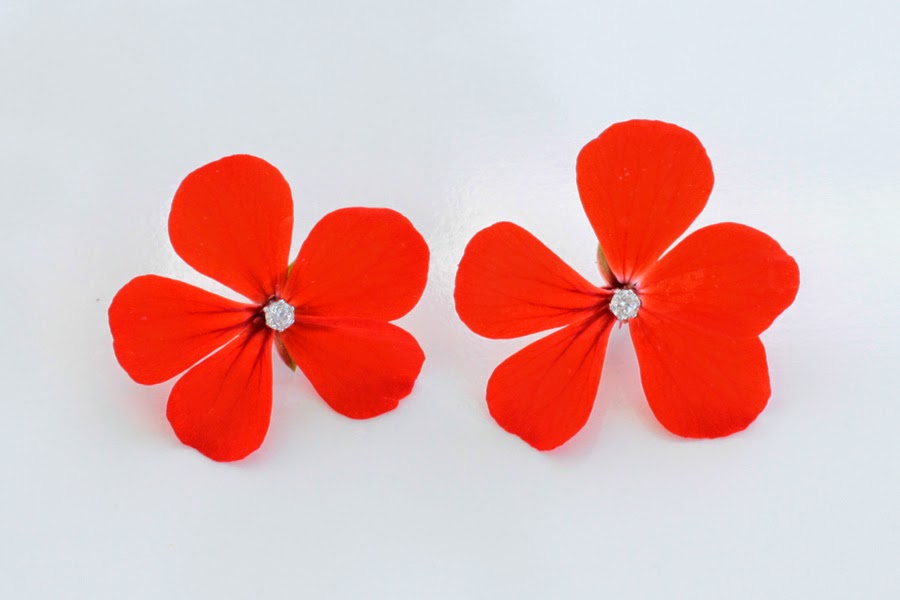
The little violas have been so pretty in my garden this summer. I was sitting there thinking about perhaps an arrangement or DIY I could do with them, when this idea struck me – to wear them as a pair of earrings!
Or you can also use: Two small basic studs – ball/crystal ones are nice
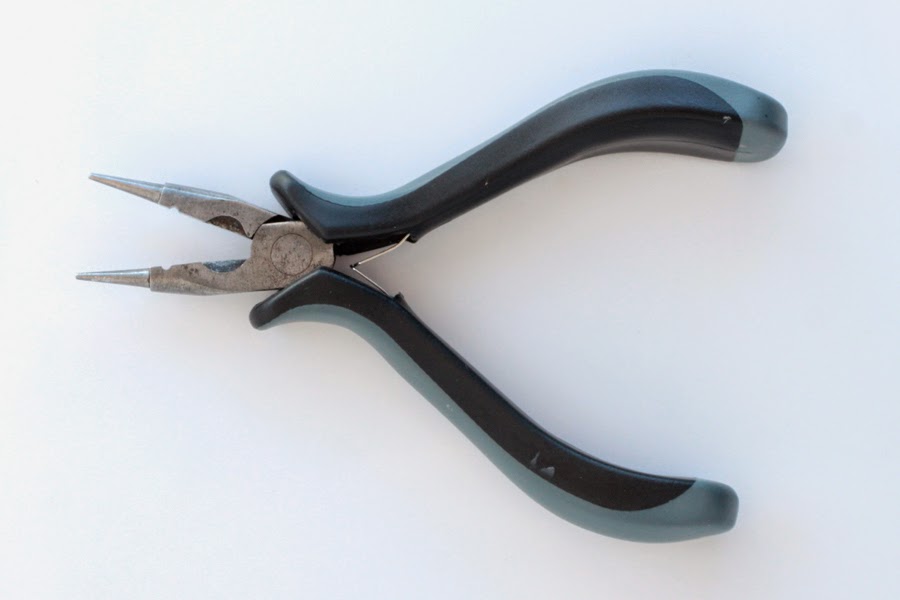
(Tip: I use sterling silver headpins as I’m a bit sensitive to metals)
Instructions:
1. Insert headpins (or post earrings) through centre of flowers – making sure it goes through a thick part of the flower.
2. Cut the headpin back to 1cm (a bit over a 1/4inch).
3. You’ll probably get a bit of pollen and muck over the headpin, so it’s a good idea to wipe this off with some paper towel (some flowers/plants can be quite irritating to the skin, make sure your not allergic too, especially if you are wearing these for a wedding/special party) I also wiped it with some alcohol to make sure it was really clean.
4. Your done!
These violas were quite delicate so I had to be rather gentle with them. They probably lasted about an hour looking ok. I think this would be such a pretty idea for a party or wedding.
If you find them a bit difficult to insert I find rubbing my ear and the post with antiseptic cream (Savlon or something similar) really helps them go in.
Here are a couple of other flowers I’ve tried:
Daises with gold posts.
Some red flowers with a pair of sparkly rhinestone studs.
The petals kept falling of these ones though!
Have you ever made fresh flower earrings or jewellery? What sort of flowers have you used? Let me know how you go making these :)
So many pretty things this week too! Babuble Bar had some great new arrivals – I especially love the necklace and circle earrings featured here. The Daisy New Look clutch is probably one of the cutest I’ve ever come across, and it’s only $25! I also love the two metallic heels, both would be so pretty to wear with lighter style spring/summer skirts and dresses.
……………………………………………………………………………………………………………..
These are all items I love the look of and are independently chosen by me. Some of them are linked to via affiliate programs, meaning I may earn a few cents if you click on their links. If you’d like more information, check out my disclosure page :)


)


)