Hi. I’m Amelia, a waitress and art school grad from Australia. I’m a lover of fashion, food and all things DIY. I’ve decided to begin a blog in order to share some of my ideas, doings and wearings.
I’ve been thinking of a few Mother’s Day ideas this week and thought I’d bring out some of my Mum’s lovely China. I’ve always thought that the patterns on these were so sweet and pretty, although they can tend to look a little dated. As an idea to make them a bit more fun and modern I thought I’d play around with mismatching a few of them – turns out I love how they look like this!
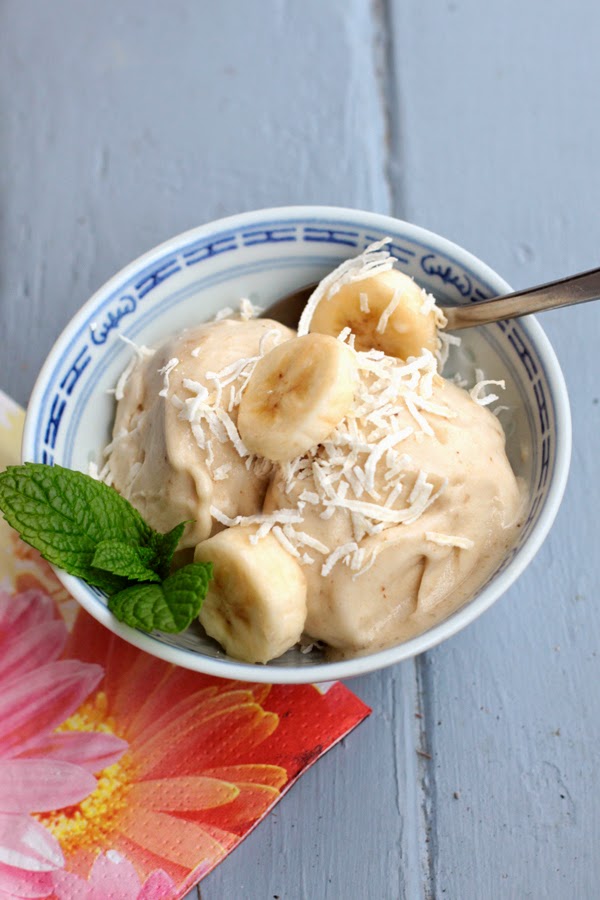
This has got to be one of the easiest recipes ever, and it’s so good too! You’d never guess it was just banana by eating it. I first learnt this idea in a health food book years ago (I think it was a Rosemary Stanton one but I’m not exactly sure). I thought it was a clever idea but was sceptical about how good it would be. The banana really does blend up into the most amazing consistency, it truly is creamy, like ice-cream and not at all icy or glunky like you might expect. It’s lovely and refreshing to eat on its own but I think best served on pancakes (a great substitute for ice-cream/cream) or with scoops of other ice-cream flavours. There are lots of other things you could add to make this extra special too – like cocoa powder, peanut butter or other frozen fruit (I listed a few more ideas in the recipe). I think you’ll enjoy making this :)
Banana Ice-Cream
Ingredients:
2 Well Ripened Bananas
Optional:
A good pinch of cinnamon
1/4 tsp vanilla
3 tsps honey or maple syrup
You could also add: Cocoa powder, other frozen fruit (such as berries or mango), dried coconut, dried fruit, dates, choc chips, walnuts, pecans, peanuts, a spoonful of cream, yoghurt or custard, peanut butter, nutella, hundreds and thousands (nonpareils).
Method:
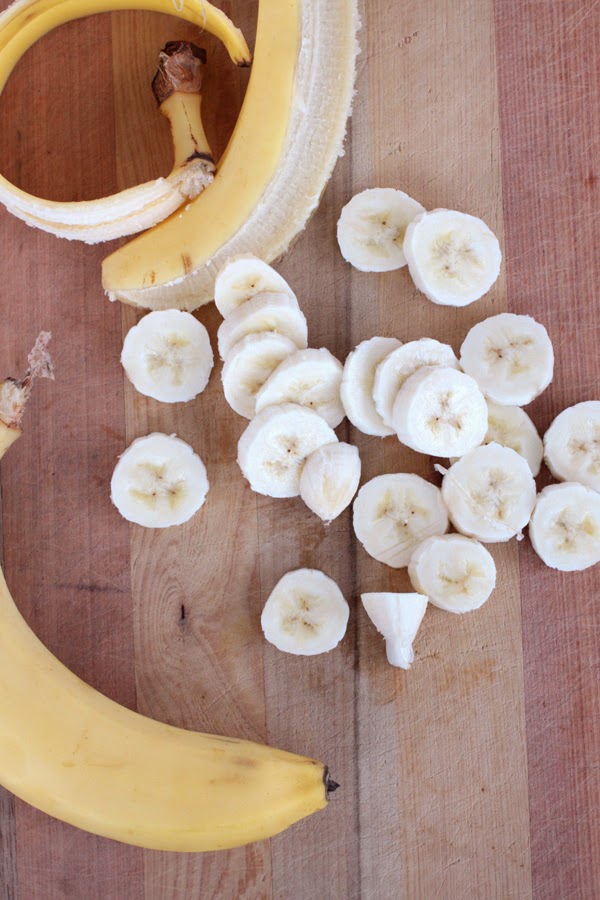
1. Slice bananas into about 1/4 inch thick rounds.
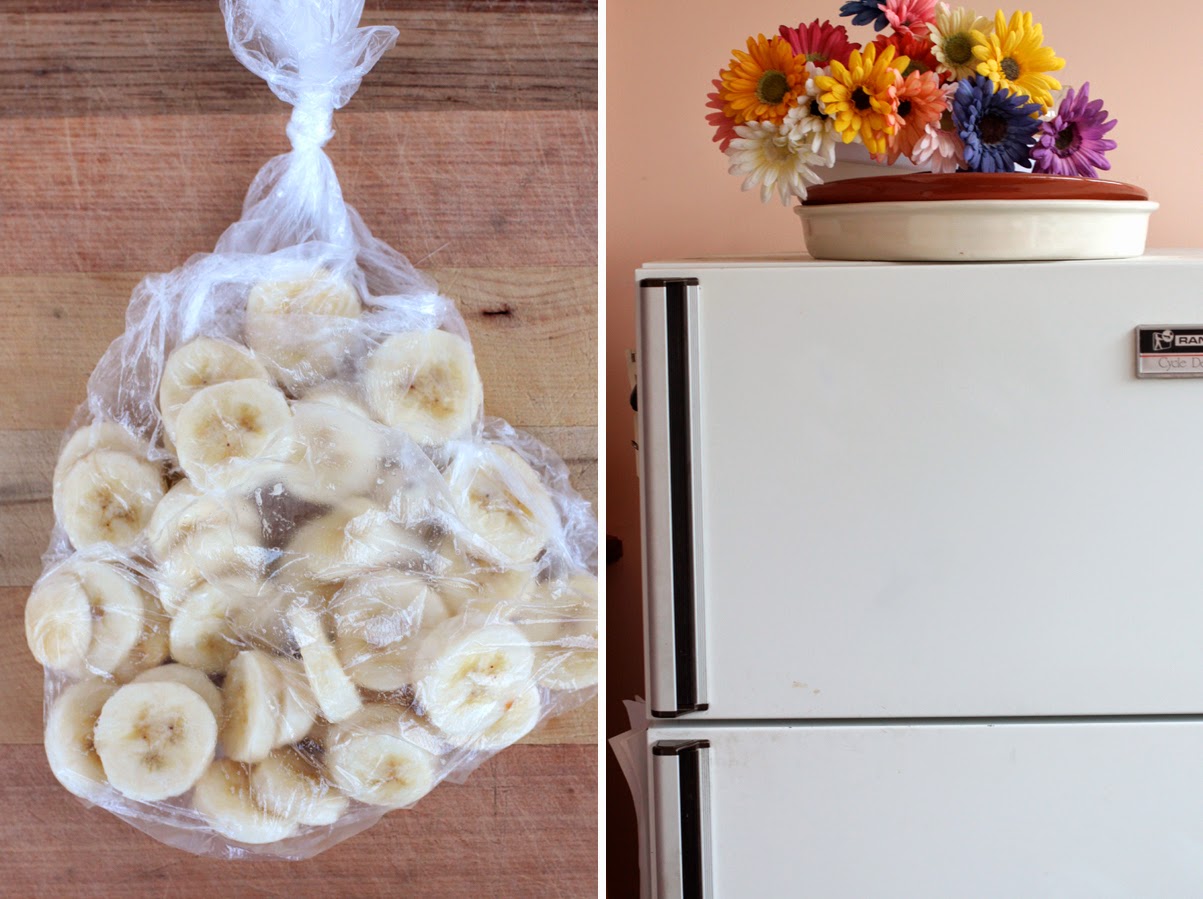
2. Put slices into plastic freezer bag or container and freeze (they should only need a night to freeze properly). It’s also a good idea to try to separate the pieces a bit so they don’t freeze in one chunk.
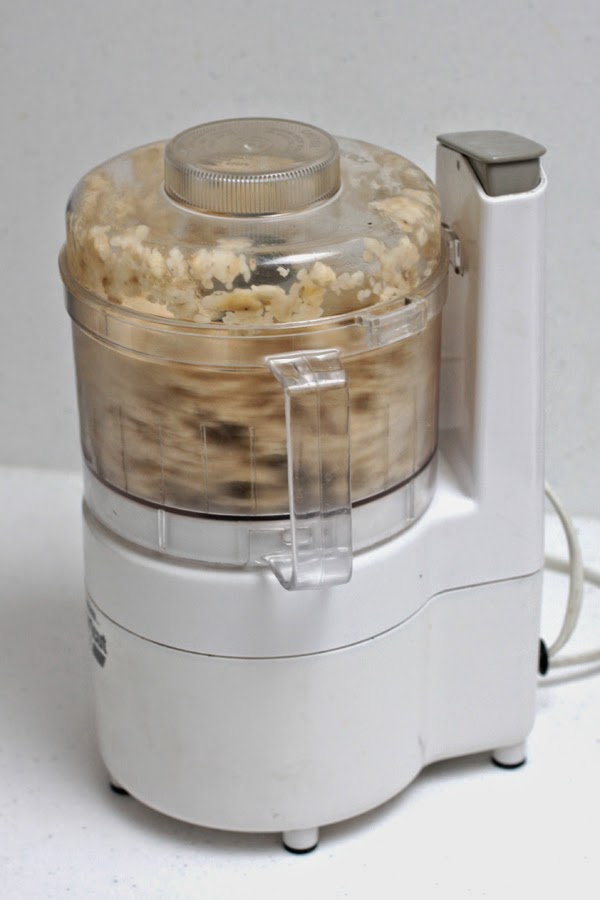
3. When ready to make ice-cream, combine banana slices with other ingredients (if using) in food processor and blend. The bananas will turn into a chunky mess for the first 30secs or so but then soften into a smooth ice-cream consistency.
4. Enjoy straight away!
Although this will keep fine in the freezer, I think it’s something that’s nicest made up fresh. It’s super easy to have frozen banana on hand in the freezer – and they keeps for months too.
Bonus Tip: You can also make fresh sorbet out of any frozen fruit in the same way using the processor. Berries are great – most will need some sort of a sweetener though. Frozen mango is really good too.
I think the ice-cream is best on hot pancakes with lots of maple syrup, butter and blueberries.
Have fun making this, and let me know how you go :)
Lots of lovely things around this week. I didn’t do too well in narrowing it down this time though. I love all the oranges and reds around but I have to say those houndstooth flats are a favourite. I thought the fan was really cute too.
Please note that some of these links are affiliated which means I may earn a few cents for your clicks. Learn more at my disclosure page :)
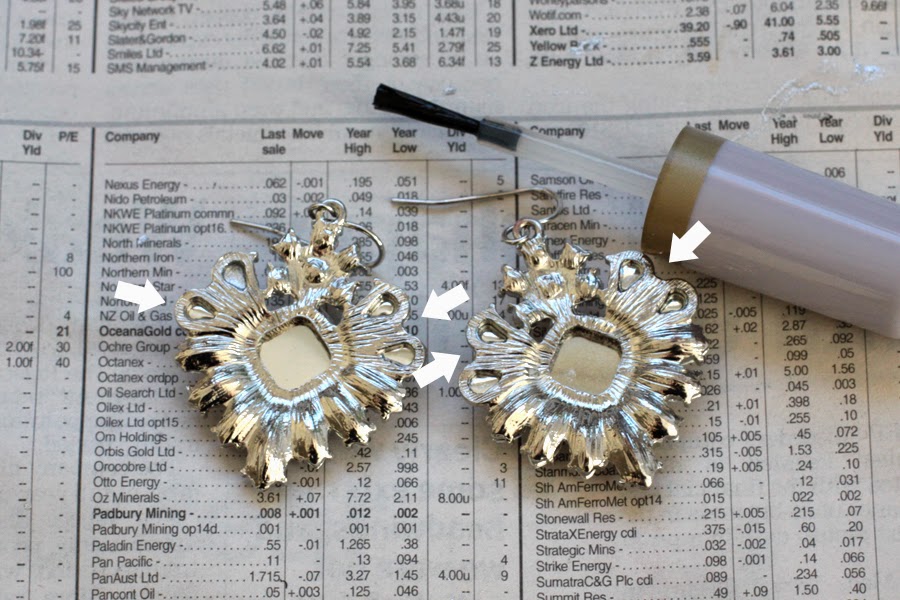
I bought these lovely earring from Lovisa the other week (they were only $3 too!) but was somewhat disappointed to discover that one of the sparkly crystals had a noticeable scratch in the silver backing. Normally I just ignore chips as much as possible and do my best to prevent them by being extra careful with my jewellery but then I had the thought – that in perhaps painting the back with silver nail polish it might not only be able to mask the hole but also prevent it from further damage too.
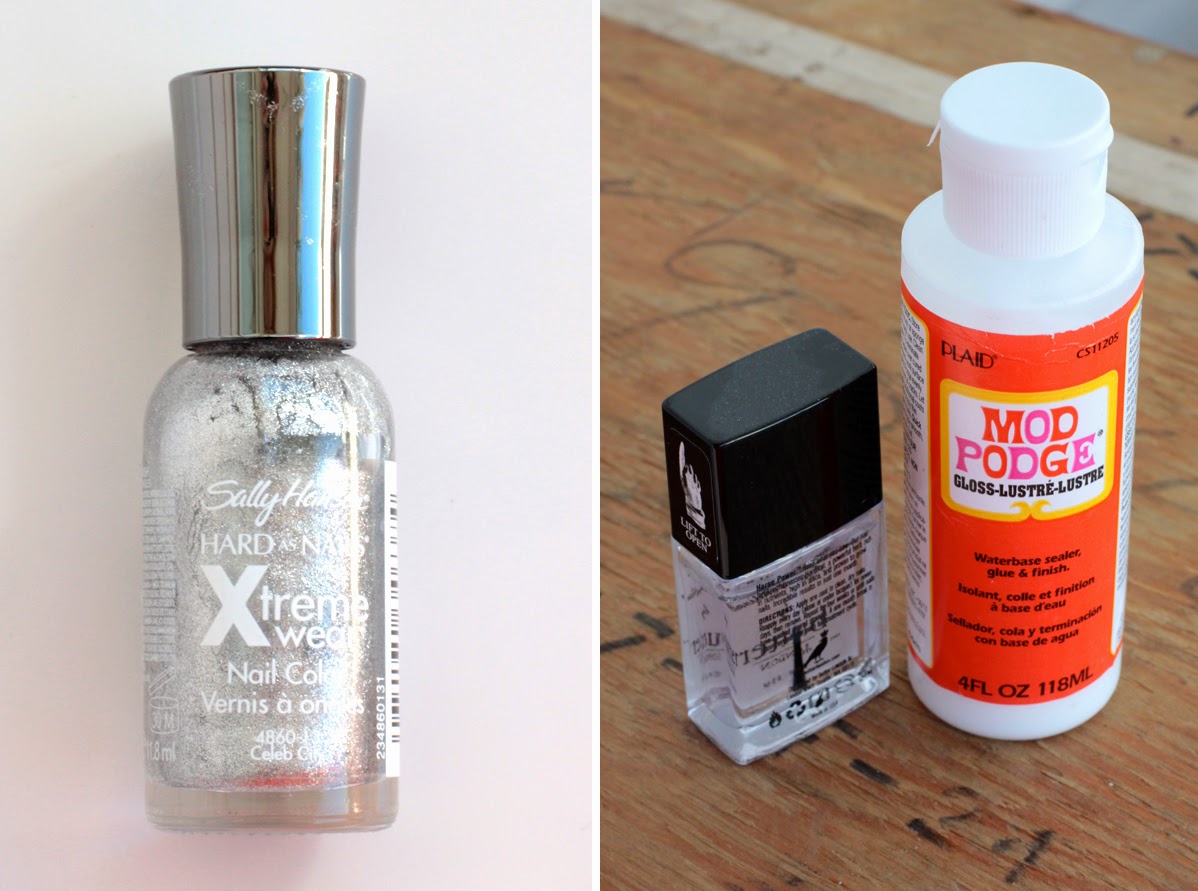
You will need:
1. Silver Nail Polish to coat small scratches
2. Clear Nail Polish, Mod Podge, jeweller’s resin or jeweller’s glue to Protect other Crystals
Here you can see I filled the chipped crystal but dotting in a small amount of silver nail polish.
I then painted all the remaining holes with clear nail polish and let it dry.
(I think something like Mod Podge would work well here too, also jeweller’s epoxy resin)
This is the finished earring. Although the silver doesn’t blend in perfectly with the stone, I think it does look noticeably better than before.
Tip: Make sure to match the colour of the nail polish with the crystal backing rather than crystal colour. Most gems in cheap jewellery like this use silver backing, even ones with coloured gemstones.
I also tried doing a few of my other pieces with a silver leafing pen, it looked alright, but I think the nail polish looked better.
I’m not sure how great this would work with patching larger holes (they might be beyond saving) but could be worth a shot.
I think the idea of preventing scratches in the first place is a really good one though, and I think clear nail polish is a really great option (I can’t imagine it would do any harm or discolour the jewellery, if you’re worried, use resin).
Anyway that’s what I’ve done and it seems to work well.
Have you ever fixed scratches in your crystal jewellery? How did you go about it? I’d really love to hear if you have some different ideas or suggestions. :)
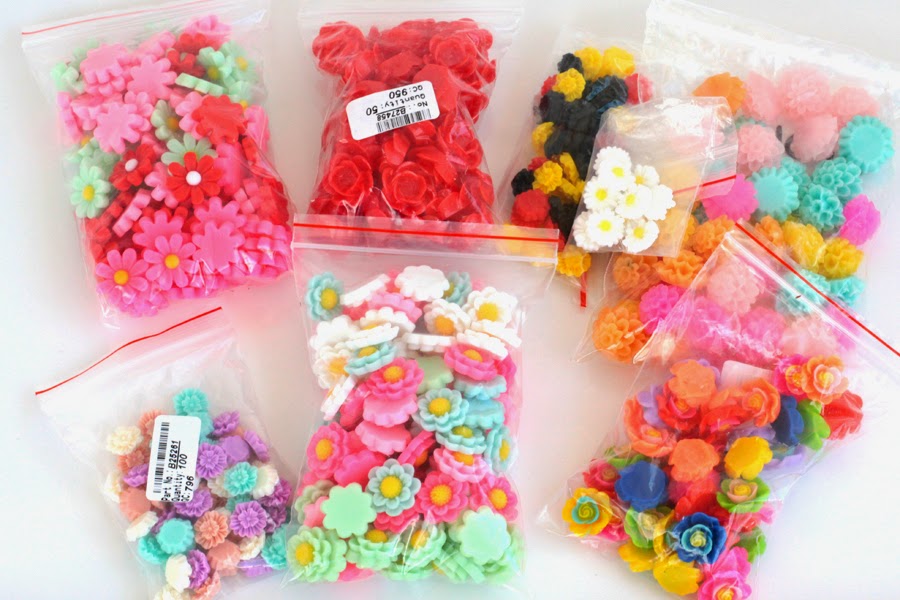
I have always absolutely adored resin cabochons and especially resin flower cabochon earrings, so I don’t know why it’s taken me this long to ever order some for myself – and I kind of ordered a lot at once! I got all these from ebay, most came from China. I really only wanted a few to make some earrings for myself and friends but it turned out cheaper (and some only possible) to order in bulk. I’m actually hoping to set up an Etsy site to sell some jewellery in the coming months so you may see some of these there :)
I did a DIY last year on How to Make Basic Stud (Post) Earringswhich is basically exactly the same as what I’m doing here. I just thought these were so cute that I couldn’t resist doing another one especailly for them :)
You will need:
Resin Flower Cabochons (available from Ebay,Amazon or Etsy), Post Findings, Super Glue
Instructions:
Dot some super glue on the back of the cabochons and place on studs. Leave for several hours or overnight to dry. As soon as they are dry they are ready to wear :)
Tips:
You’ll want to pick a stud finding that is similar size to the cabochon so that the glue has more surface to stick to. If the post finding is too small it won’t be strong enough to hold the cabochon.
Earring Post/Stud findings are available from craft stores. Ebay, Amazon and Etsy sell them too, plus I’ve got a few links to craft sites in my links tab :)
Lots of jeweller’s use E6000 as it’s one of the strongest glues for metal, just be warned that it does have rather toxic fumes though (will give you headaches). I prefer to use a non-toxic superglue (such as Ultimate Glue by Crafter’s Pick)or mixing a small batch of non-toxic epoxy resin (such as Little Windows).
Make sure to double check the size of the cabochons when you’re ordering them – they can range from a couple of millimetres up until several centimetres and the photos can be a bit misleading sometimes.
I’ve had great experience ordering these direct from China (on ebay). You can get all sorts of bulk lots for less than $4 and they pretty much always offer free postage (although it does usually take a couple of week to arrive, sometimes even up to a month).
Watch out for sellers on ebay or Etsy that sell mixed packs of all sorts of different colours and styles. They are usually a little more expensive but worth it if you don’t want to end up with a number of bulk lots with heaps leftover.
It’s easy to change the colour of the cabochons with nail polish too :)
A few other uses for cabochons:
A hope to do a few more DIYs with these in the near future but a few ideas include glueing them to ring findings, sunglasses, bobby pins, shoes, a clutch or a headband. You can drill a hole in them to create a bead. You could glue a magnet to the back of them to make some super cute decor for your fridge. They would make adorable game tiles too.
Are you in love resin flowers too?? What sorts of things have you made with them? Happy Easter for tomorrow everyone :)
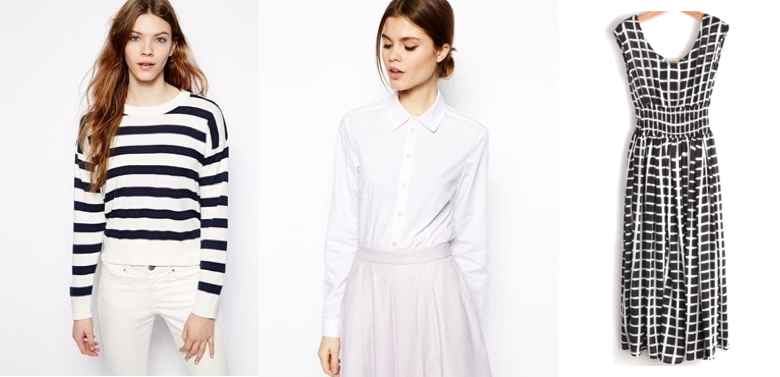
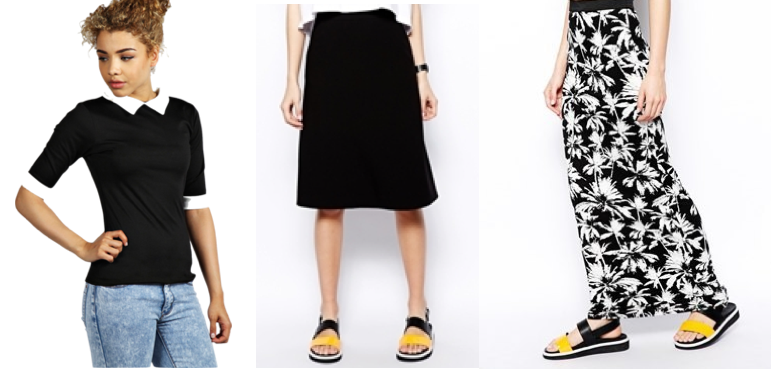
Just having a bit of a look at some online shops this evening – there are some rather lovely black and white pieces around at the moment – and these are under $50 too!
Please note that some of these links are affiliated which means I may earn a few cents for your clicks. Learn more at my disclosure page :)