I’m not a big chocolate eater so I feel I miss out during this time of year. I love having a sweet treat to look forward to though, so when I discovered this recipe a couple of years back it instantly became a favourite. Although these are a slightly healthier alternative to a chocolate easter egg, they are every bit as yummy (well, at least to me anyway).
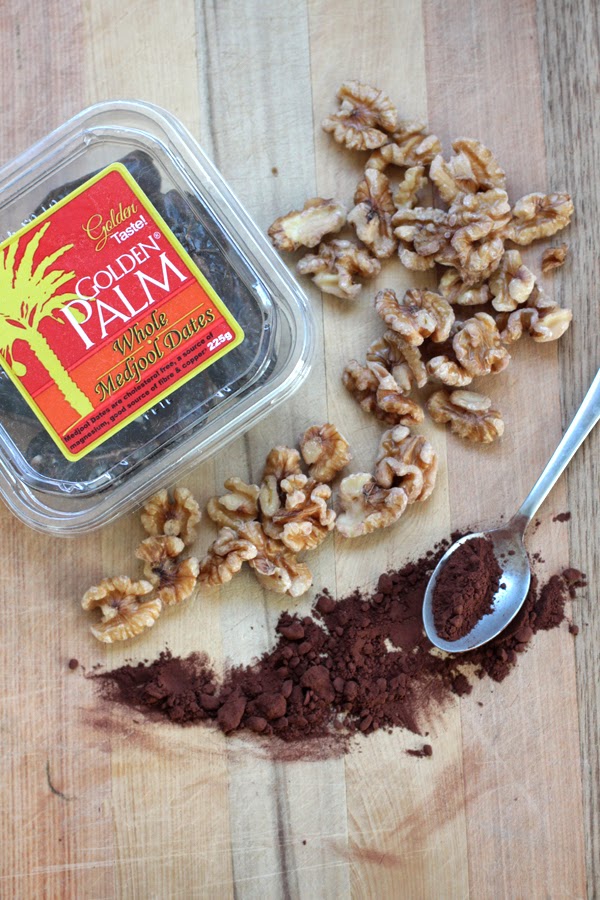
These are made from just 3 ingredients and are super quick and simple. I originally got this idea from one of my favourite cookbooks – Stephanie Alexander’s A Cook’s Companion. You can use any nut or dried fruit really but I agree with Stephanie – in that the walnut/date combination is the best.
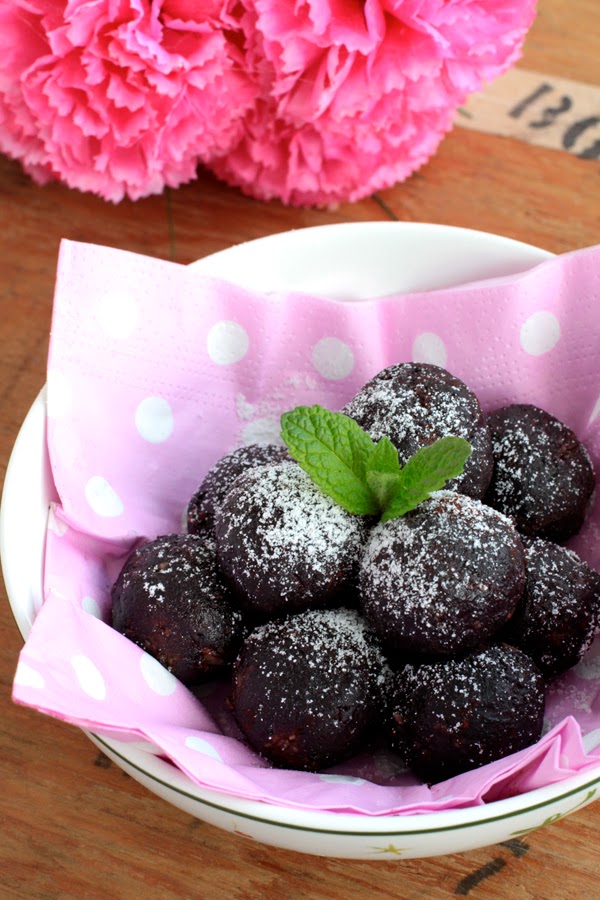
Date and Walnut Chocolate Truffles
Ingredients:
Makes about 15 truffles.
1 cup Fresh Dates (Medjool)
1 cup Walnuts
2-3 tbsp Unsweetened Cocoa Powder
You could also use: Any mixture of dried fruits, nuts or seeds, icing sugar or dried coconut (for rolling) or dip them in melted chocolate.
Method:
1. Remove pips from dates and roughly chop.
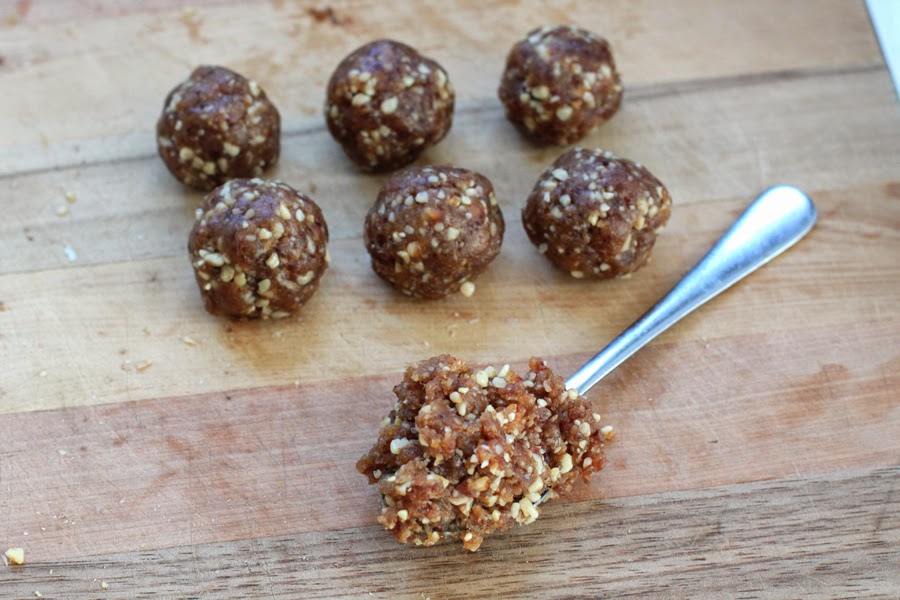
2. Combine with walnuts in food processor and process until nuts are finely chopped (see pics)
3. Empty contents into bowl. You made need to give it a quick mix. When I make this there are usually a lot more nut pieces at the bottom of the processor.
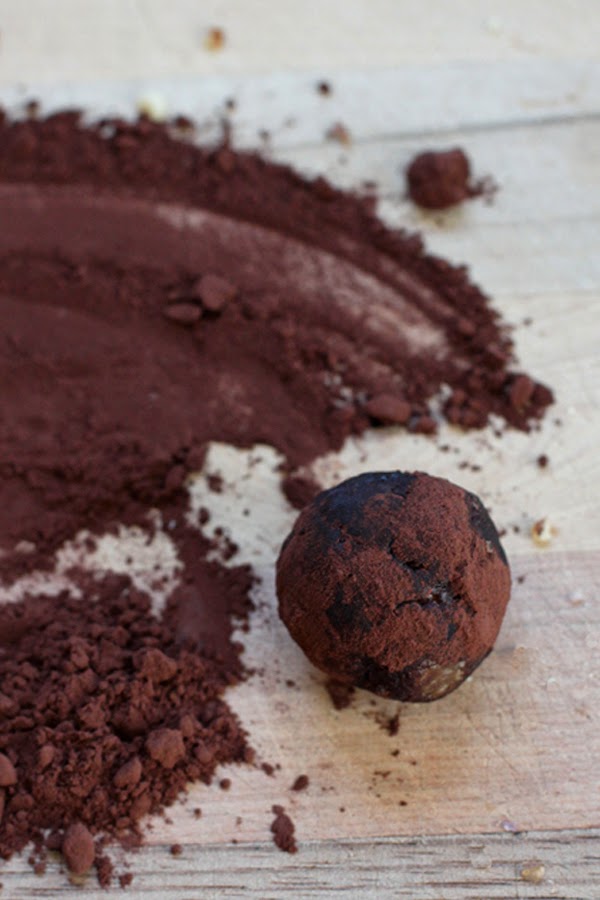
4. Using a teaspoon, form the mixture into balls and then roll them in the cocoa powder until completely covered.
Done.
These are best eaten straight away but keep fine in the refrigerator too. They can be a little sticky on a warm day so serve with napkins if doing so (or you can always dip them in melted chocolate too). The quantities for this don’t really have to be exact, I usually don’t measure it out and they always work fine. :)
Yum yum.
Happy Easter Everyone :) Let me know how you go making these :)
Do you remember my homemade cream cheese recipe I wrote a couple of weeks back??? Well I’ve been playing around with some cider making the last couple of weeks as a way to use of all the leftover whey I was making (as well as enormous amount of apples we have at the moment). This is probably one of the most interesting things I’ve ever made. It’s absolutely delicious, but completely not what I expected. It’s buttery, caramely, fizzy, sweet, salty, sharp and appley all at once. It almost tastes like it’s cooked but it has an incredible freshness to it too. The taste reminds me somewhat of a Butter Menthol. My Mum thinks it tastes like how she imagined Butter Beer to taste in Harry Potter. It’s incredibly good though and I imagine it might become somewhat of a favourite.
This is a recipe I’ve adapted from Sally Fallon’s Nourishing Traditions. It’s a traditionally fermented beverage, which relies on the production of lactic acid (the bacteria that ferments yoghurt or sauerkraut) to preserve the juice rather than alcohol. Lacto-fermented beverages used to be highly valued in traditional cultures and were also sold from soda fountains in old pharmacies as health tonics. They have several wonderful health benefits, such as being a natural probiotic, source of enzymes and electrolytes. Most importantly though they are super delicious and leave you feeling full of energy!
I’m sorry that this is going to be a bit of an inaccessible recipe, in that you’ll need to make yogurt cream cheese or have whey in order to do this. It’s totally worth it though. It’s very much something different and fun to do.
Fresh Apple Cider
(Lacto-Fermented/Non-Alhoholic*)
Ingredients:
-About 30 Apples
-1/4 cup Whey (leftover from yoghurt cream cheese recipe, also make sure it doesn’t have milk particles i.e. it’s clear, and made from natural yogurt)
-1/2 heaped tablespoon of unrefined (Celtic, Maldon) sea salt
(My recipe here says that it’s important to use unrefined, natural sea salt but gives no reason why, I haven’t been able to find any other information otherwise. I imagine it would work ok with regular salt but that it’s not quite as good for you???)
You could also use:
2L (1/2 gallon) of commercial apple juice
1/4 cup whey
Pinch of salt (as commercial juice is already pasteurised you shouldn’t need much salt
*I wrote that this is non-alcoholic but there are times when lacto-ferments are mildly alcoholic (probably 0.5-1%). I’ve found this most with fruits, especially ripe berries and will depend on the nature of the ferment (temperature, ripeness of fruit, speed of ferment etc). So this might not be 100% non-alcoholic every time but it’s definitely a great alternative to regular cider.
Method:
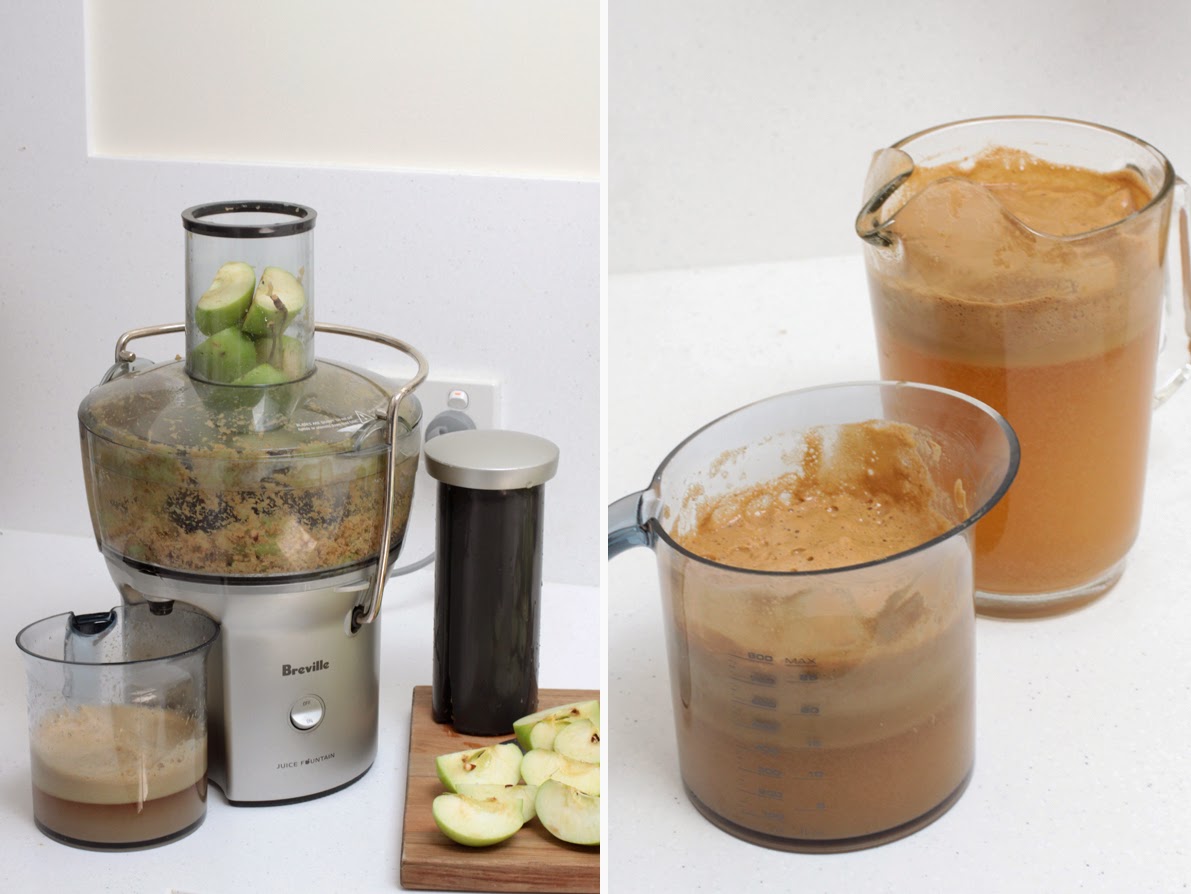
1. Wash and juice the fresh apples with a juicer. You should get about 2L (1/2 gallon) of juice from 30 medium sized apples.
2. Remove any of the scummy foam that rises to the top and strain into a large, clean mixing bowl.
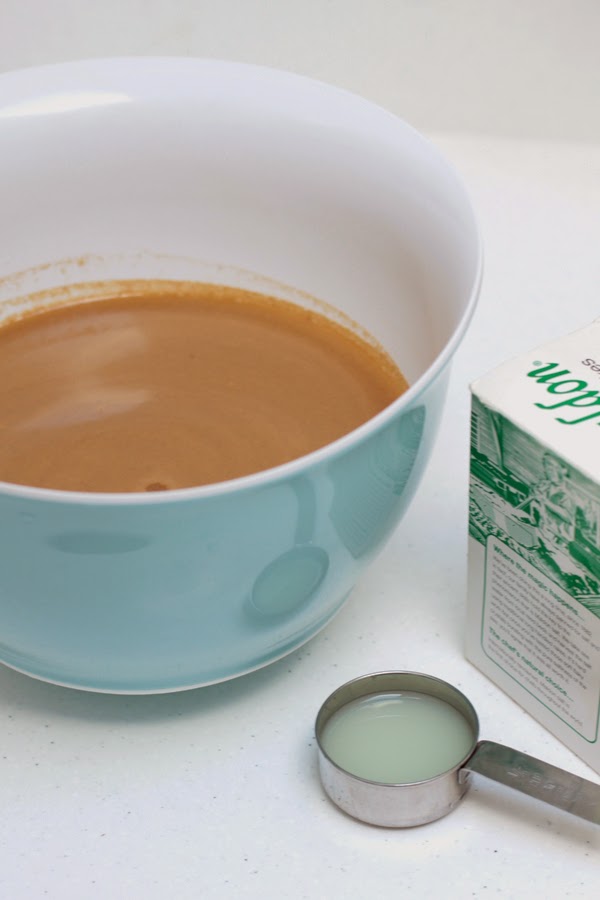
3. Add the salt and whey and stir well.
4. Cover bowl with a tea towel and secure with large elastic band. Leave at room temperature for 3 days. You can check and taste the mixture at any time. I found it quite fun to see how the taste changed and developed over each day. I stirred mine quite a lot too. It’s a good idea to check for mould after a day or so (not a good sign). This happened to me the first time I made it as I didn’t add salt. I saw small white dots of mould forming within less than a day of leaving it. If it starts to mould, it hasn’t worked and you’ll need to throw it out (I’m sorry).
5. After three days the juice will have fermented and there should be a small amount of bubbly foam on the surface. Remove as much of this as you can with a spoon, then strain mixture into 2 one litre jars/jugs/containers/bottles and store in refrigerator. There will be sediment on the bottom too. I rather quite like this and shake it into my cider but if you want to leave it it’s fine, it should stay there when you pour out the cider.
The cider is ready to be drunk straight away, although the flavours should continue to develop and deepen over several weeks. If you plan to leave it a while, store in an tightly covered bottle/jar, otherwise it’s fine in a jug!
Done! I really hope this works out for you. It took me a couple of goes to get it right. Just don’t skip on the salt or whey and you should be fine. The brown colour of the juice isn’t the prettiest of things, I wonder if adding some fresh lemon juice would help at all?? Experiment with different juices too, most should work using the same quantities and method above.
Serve with lots of ice and enjoy!
Have you ever tried making homemade cider before? If you make this let me know how you go. And I’ll be interested to to hear what you think it tastes like too! :)
It was a bit of a grey drizzly day today (it’s really starting to feel like Autumn now) so I thought I’d treat myself to something warm, nourishing and delicious for lunch. My brother first taught me this recipe about a year ago now and it’s since become a favourite. It’s super easy and a great quick, healthy snack idea. This would be just as delicious with a number of different seasonings and vegetables too (I wrote some ideas under the ingredients list). Have fun making these!
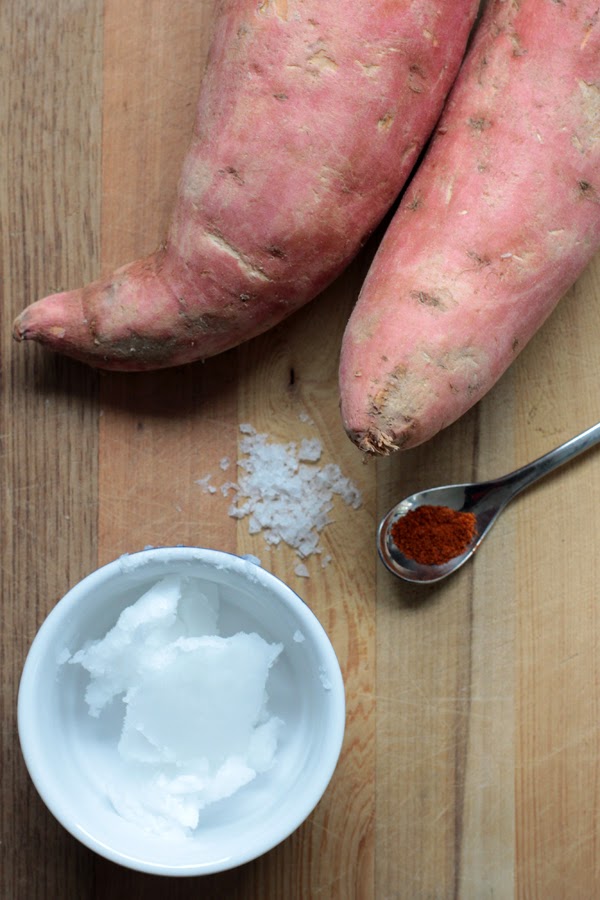
Baked Sweet Potato Chips with Chilli, Sea Salt
and Coconut Oil
Ingredients:
Sweet Potato
Ground Cayenne (Chilli) Pepper (a good couple of pinches per potato)
Sea Salt (a good couple of pinches per potato)
Coconut Oil (about 1tbs per potato)
Extra Coconut Oil to serve (melted)
You good also add/use: Any sweet, citrusy or spicy herbs/spices – cumin, coriander, paprika, sumac, cinnamon, nutmeg, rosemary, thyme, sage, curry powder, garlic powder, honey, maple syrup. Olive oil, butter, ghee, sesame oil. Sour cream/chives, cream cheese, sweet chilli sauce to serve. You can pretty much make these with any root vegetable too – carrots, beets, potatoes, turnip, parsnip, pumpkin.
Method:
1. Preheat oven to 190oC (375F). Peel potatoes and slice into thin, even rounds with either a knife or mandolin. Don’t worry about the ends, they are kind of tricky – I save them to roast with other vegetables later. The thinner you are able to cut them the crunchier they will be, the thicker – the chewier.
2. Mix potatoes with oil, salt and chilli in bowl, making sure they are coated evenly.
3. Arrange slices on baking sheets and cook for 10-15mins. Flip pieces over and cook for a further 10 or until pieces begin to brown slightly. You may have to take some of the thinner pieces out earlier as they will burn otherwise. If you find they brown too quickly you may need to drop the temperature of the oven slightly.
4. Yay! You’re done – some chips will be crunchy and others chewy. I think it’s really nice to have a mix of both. As soon I take them out of the oven I placed them on baking rack to cool down for a couple of minutes as they are quite steamy.
Eat them hot. My absolute favourite way to eat them is by dipping them into warm coconut oil – it’s so delicious. I think it’s the best part of eating them! You could also use olive oil, butter or sour cream too or just have them on their own. You might want to add extra salt and chilli too.
These are yummiest dipped in melted coconut oil – Sour cream in rather nice too.
The chips don’t tend to keep too well so eat straight away (I imagine you probably will anyway)
Have you ever made chips at home? What sort have you made? Let me know how you like these :)
A bit of a different post today: Homemade Cream Cheese!
Cream cheese made from yoghurt is not only super delicious but easy and fun to make too. I make it all the time at home and usually have some somewhere abouts in the fridge. It’s much fresher, lighter and tangier than the usual commercial varieties but has a similar richness and smoothness to it too. It can be substituted in any recipe that calls for for cream cheese and easily made into dips, toppings, sandwich fillings, snacks, pizzas, quiches, salads or enjoyed on it’s own. The cheese also contains all the probiotic health benefits of yoghurt and can be made with your choice of low fat, high fat, sweetened, unsweetened, goat/sheep milk or even fruit yoghurt.
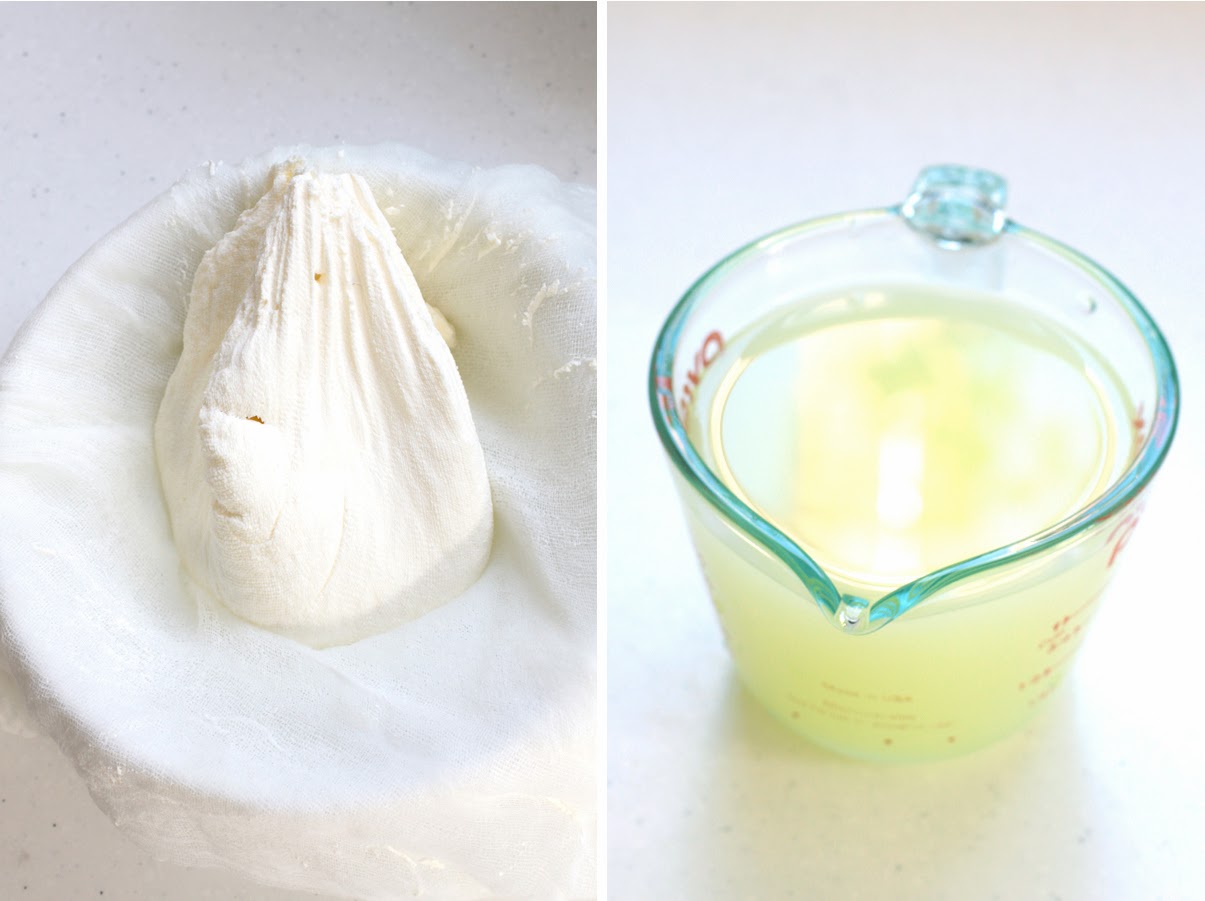
Make sure to save the whey when making this too as it’s a great, highly nutritious addition to smoothies, juices, soups, marinades or salad dressings. It can also be used to ferment/pickle fruits and vegetables, make cider (see my recipe for fresh apple cider using whey) and taken as a probiotic. If you find the cheese is too thick you can also mix back in some of the whey afterwards.
Yoghurt Cream Cheese and Whey
You will need:
1 tub of Natural Yoghurt
(Or any other type of yoghurt. The thicker types generally work best for this though. I’ve never used sweetened yoghurt myself- it will definitely work but I imagine will be very sweet so it might be best to add sugar/sweetener afterwards).
Cheese cloth (muslin) or a clean dish towel
Medium Sized Bowl
Wooden Spoon
Strong Rubber Band
6 Cans
Plastic Sieve (if you are using thinner yogurt)
Method:
1. Line bowl with muslin (doubled over) and empty in yoghurt. If the yoghurt is particularly runny you may find it easier to place muslin and yoghurt in sieve over the bowl for a couple of hours first so that some of the excess whey can run off.
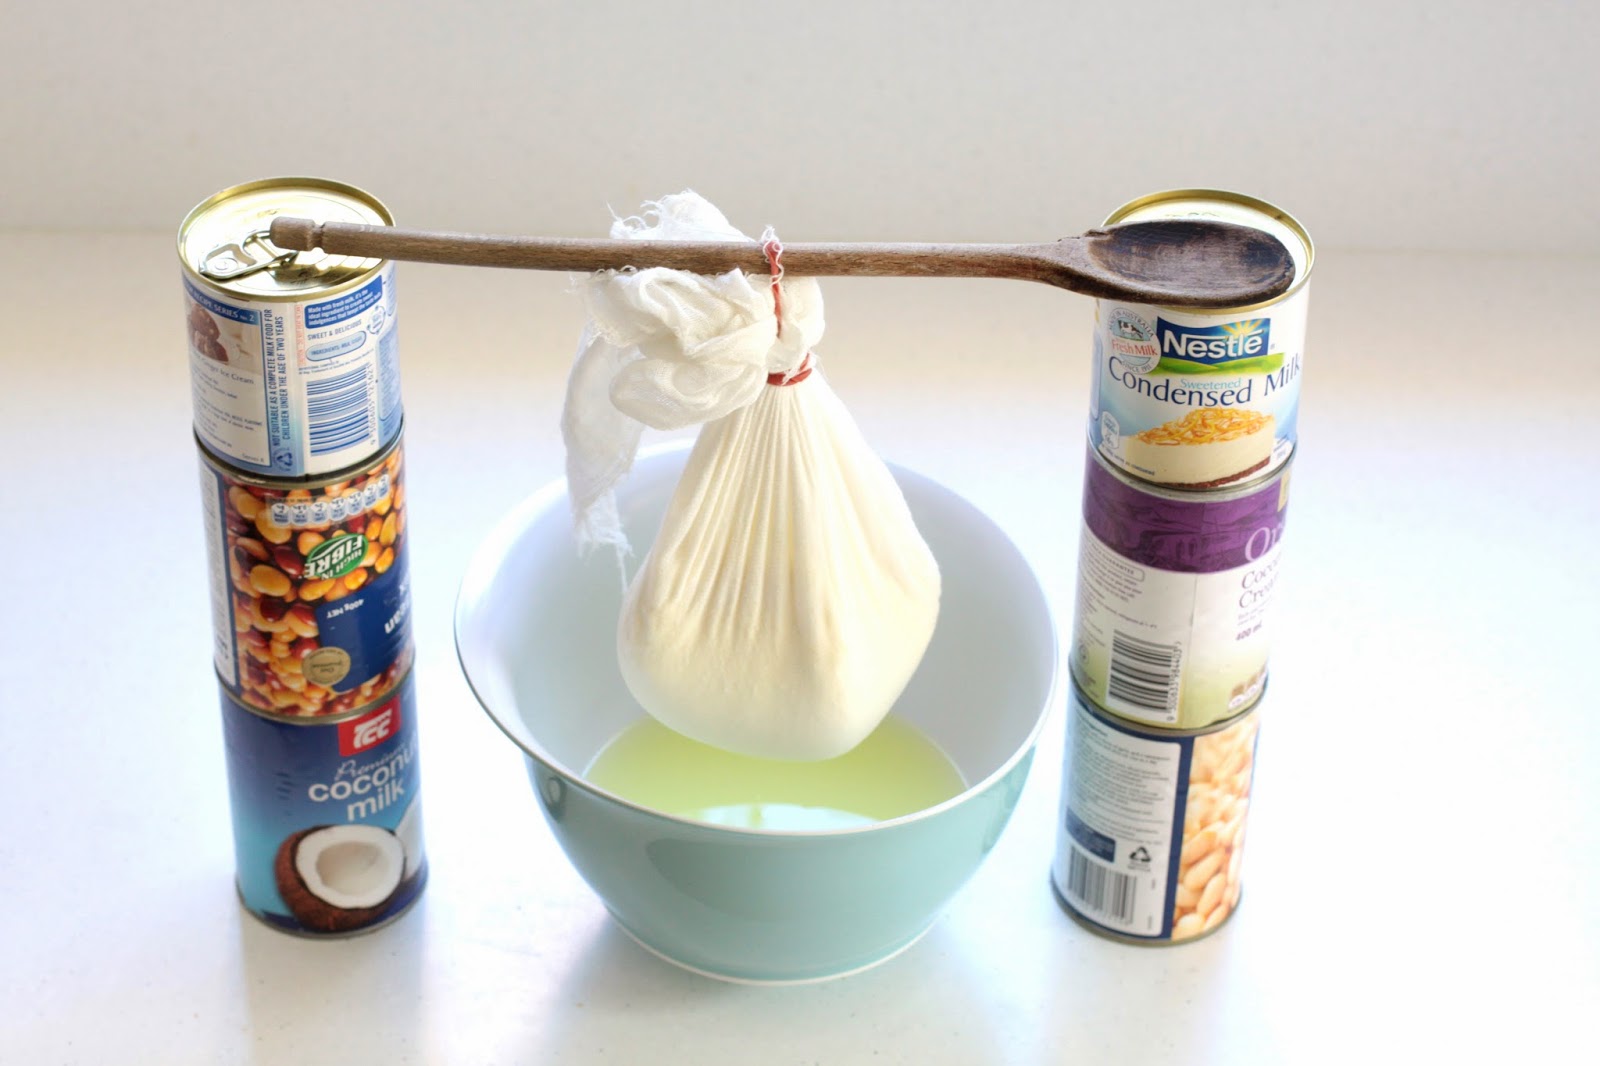
2. Tie up muslin with a rubber band and suspend over bowl using the cans and wooden spoon. The whey from the yoghurt will begin dripping through the muslin and into the bowl.
3. Leave for several hours or overnight (until the yoghurt stops dripping). I think this usually takes about 8 hours. If you like a softer cream cheese you can remove it earlier though.
4. Unwrap the muslin and the cheese is ready!
(And make sure to save the whey too – see intro for some uses)
The muslin should last for several goes at cheese making as long as it’s rinsed out and dried well. If it starts to smell or discolour (mine usually goes red!) throw it out.
The cheese should last for at least couple of weeks in the fridge.
My favourite use for this is in dips and salads. It also makes great quiches too or just nice to have on its own.
Have you ever made cheese at home? Let me know if you make yoghurt cheese and how it turns out :)
I sometimes work weird hours waitressing and end up having the weirdest meal times so it’s not too unusual for me to eat by myself. Even if I eat alone, I will always try to make an effort to make something nice for myself. One of my favourite things to have is freshly made soup made from whatever vegetables and meat I have in the fridge or freezer. This chicken and vegetable soup is one I probably do most frequently.
This is a basic, anything goes kind of a recipe, you could add pretty much anything you like to it. What really makes this soup work is a good, flavoursome chicken stock, so make sure to use a quality one, preferably home-made. I buy bulk chicken frames at the local butcher for a few dollars and every few weeks or so make a big batch to keep handy in the freezer in takeaway containers. It makes nutritious, tasty meals so easy and quick to prepare.
This is my standard version of it, I actually prefer it without onion or garlic but of course you can add them if you like:
Quick and Simple Chicken and Spring Vegetable Soup
for One
Ingredients:
1 Chicken Drumstick
2 Cups of Chicken Stock
Half a Carrot
Half a Celery Stick
Half a Baby Fennel Bulb
2 teaspoons of Butter
Olive Oil to Drizzle
Parsley to Garnish
Sea Salt and black pepper to Season
You could also add:
Asparagus, green beans, corn, peas, baby spinach, kale, parsnip, potatoes, sweet potatoes, pumpkin, turnip, brussel sprouts, cabbage, beetroot, fresh tomato, zucchini, zucchini flowers, canned tomato, canned beans, grains, pasta, noodles, parmesan, garlic/onion/leek/bacon (make sure to cook these ones a bit first in butter before adding liquid), lemon juice
Any would taste great together in combination – I think its best to keep things simple overall so I wouldn’t do much more than 5 different veggies though.
Method:
1. Bring Stock to boil in saucepan and add chicken. Reduce heat to simmer, cover a bit with a lid and cook for 25mins.
2. Meanwhile prepare and cut the vegetables into 1cm (1/3 inch cubes).
3. Add any vegetables to the saucepan that need to be cooked in last few minutes – I cook carrots for about 3mins – potatoes, broad beans or kale you’ll need to cook for about 7mins (possibly more), parsnip or green beens 5mins, asparagus no more than 1 1/2 minutes. I don’t like to cook the vegetables for very long when I do this so that they retain freshness and texture, but of course you could cook them for a lot longer.
4. Remove saucepan from heat and take out chicken to rest.
5. Add butter and pour hot soup over remaining veggies that didn’t need much cooking.
6. Pull meat away from drumstick and slice into bite size pieces.
7. Add chicken to soup, drizzle with olive oil and garnish with parsley.
Season to taste.
Serve with fresh bread or toast if you like, I usually just have it as it is!
Hope you like this simple and quick lunch idea :)
What are some of your favourite recipes to cook for a quick and easy lunch?
Well I thought I’d do something a bit different again today. I mentioned earlier in the week that I felt like starting a few more lifestyle related posts and recipes. I love cooking and although I don’t have the greatest experience, I love trying new things and collecting recipe ideas. I’m not planning to do a lot of these posts, maybe once a fortnight at most – and I always hope to share food I think you’ll be interested in too – yummy snack ideas, fast dinners, healthy desserts.
Simple BBQ/Campfire Baked Apples
(Or in the Oven)
I forget how much I love baked apples and can go without having them for ages (I think this is the first time I made them in about 2 years!). I generally prefer more of a simple baked apple. I add minimal ingredients to initially fill them with (usually just dried fruit, maybe some nuts and spices) then add sweetener, butter, berries and anything else I like at the end. I find that the apples have just as much flavour as when everything is cooked all at once, but they taste much fresher. Also this means that everyone can tweak just how much sugar or butter they’d like too.
This is the first time I’ve tried cooking apples in the BBQ. We had a family dinner over the weekend, and, as we have so much fruit at the moment, we thought we could try baking a few in the fire. The result was really yummy, every bit as good as oven baked ones with the extra specialness of being cooked over an open flame.
Ingredients:
To Start:
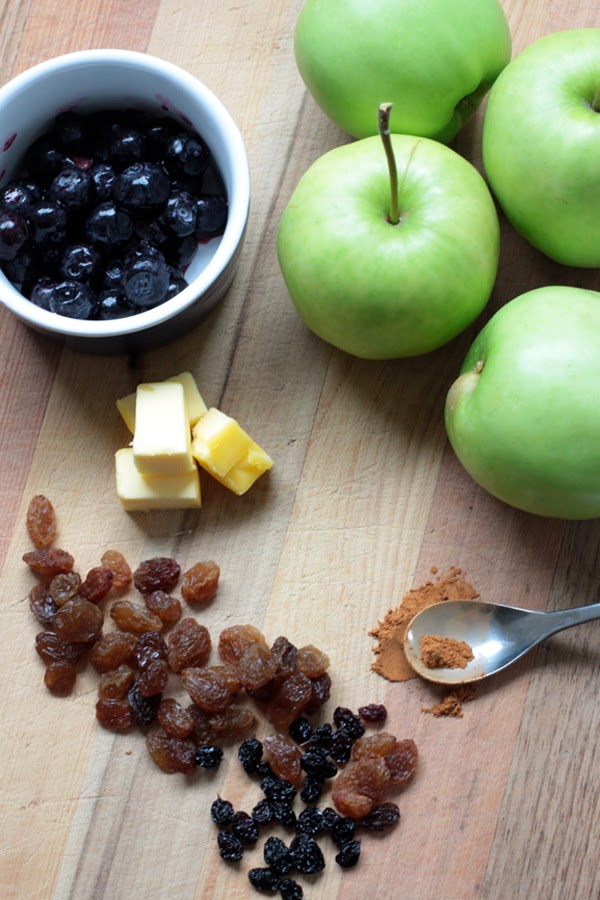
Medium- Large Sized Apples
2 Tablespoons of Dried Fruit per apple (I chose sultanas and currants)
You could also add – Chopped nuts, spices (cinnamon, cloves, nutmeg, ginger, mixed spice, vanilla), citrus peel, cooked grains, sugar, orange juice (in the baking tray)
To Finish:
Cinnamon
Blueberries (Fresh or Thawed)
Unsalted Butter
Maple Syrup
Double Cream
You could also add – any berries, fresh apple slices, yogurt, custard, cream cheese, lemon juice, honey.
Method:
Core the apples and fill them with the dried fruit.
If you’re putting them in the BBQ you’ll need to wrap them first, in a layer on baking paper (you could dampen this too but it worked fine for me without doing so) and then in at least 2 layers of foil. Cook apples in the fire for 15-25mins. This will depend on the heat and strength of your particular fire so keep an eye on them. I cooked mine for 20min on hot coals next to the fire.
If you’re putting them in the oven, place apples in baking dish and cover with a lid (or foil, or don’t worry about it). You can add some liquid to the bottom of the dish too to prevent the apples from drying out too much (like water or orange juice), but this isn’t necessary. Bake for 35mins at 350oF (180oC), then remove lid add cook for another 15mins. I’ve seen recipes cook for quite a bit longer than this and also quite a bit less than this – so see what works best for you.
Place apples in serving bowls, add butter to them while they are still hot (I put about 1tsp on mine) then finish with berries, a dollop of cream, a drizzle of maple syrup and a sprinkling of cinnamon (or whatever else you like).
I cutout a little apple slice star with a biscuit cutter to make it look pretty for the photo – I think it’s actually really nice to serve with a few fresh apple slices too :)
How do you like your baked apples? Have you ever tried cooking them on a fire?


)


)