It’s fun to play around with necklace lengths and making a necklace extender is super easy! Here’s how:
What you’ll need: Jewellery chain (around 3-4mm width is best), a necklace clasp, jewellery pliers, jump rings (optional).
The Steps:
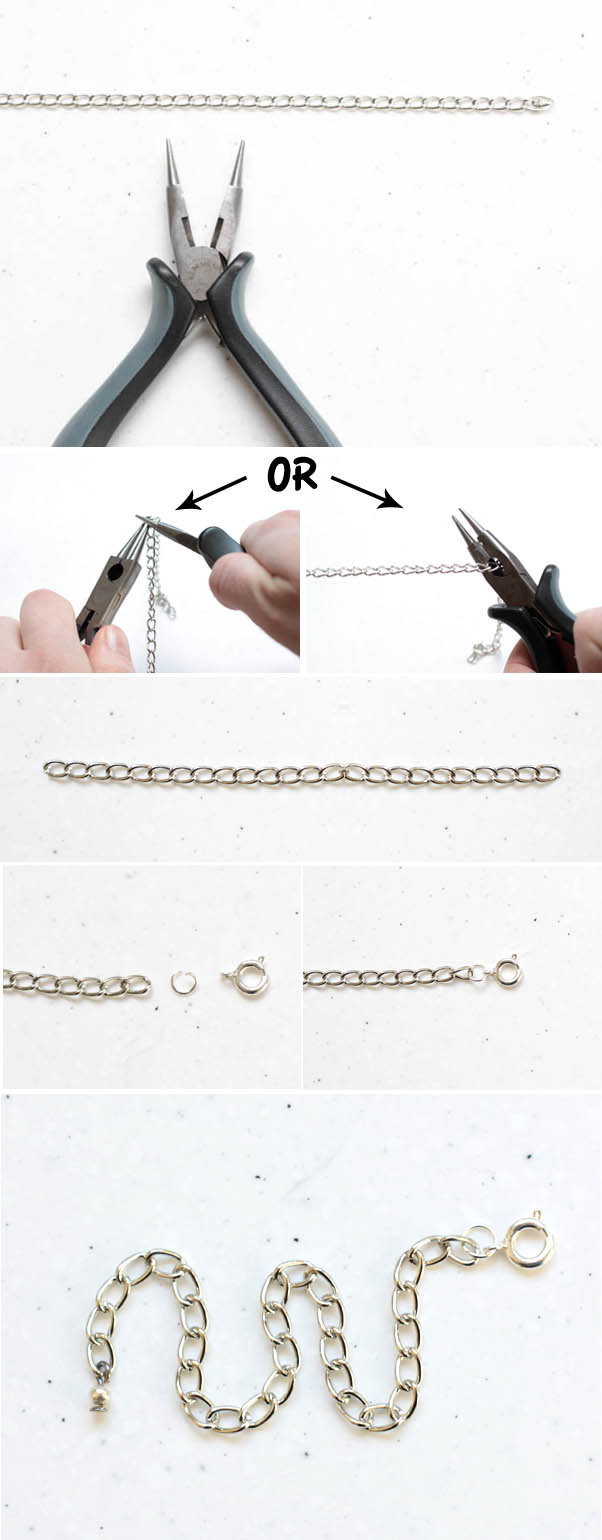
1. Decide on your length of chain. This is really up to you and the type of necklace you’re using it for. About three inches is what I chose here.
2. You can either open the chain link with jewellery pliers (having 2 sets of pliers makes this easier) or just cut right through it.
3. Attach clasp. You can use a jump ring to do this or link directly to the chain. I think a jump ring gives a nicer finish but it really doesn’t matter.
4. The end result! You can attach a small bead to the end it you like for a more professional look.
How to attach:
And now you can play with lengths!!
Here are some leftovers from previous refashions (you may recognise some of these!) I see lots of potential necklace extenders here!!
Jewellery chain, clasps and pliers are available at most craft shops and online jewellery supply sites. I’ve got a few links in my links tab. You can also buy something called extension chain which is basically a necklace extender without the clasp. Have fun!
I only have time for a quick refashion this week sorry! I bought these incredible earrings at Lovisa a few days ago.
These are a drop stud earrings. I’m sensitive to cheap metal and I won’t be able to wear them as they are, so, I’m going to convert them to silver hooks! I know I’ve done a few tutorials like this before but this one is a little different. I also wanted to show off these earrings!
This is super easy. All I did was open the jump rings with jewellery pliers and removed the studs (you could also just cut them open). I then added hooks!
See this previous tutorial which teaches you how to attach hooks. There is information about supplies there too – it should be cheap and easy to come across jewellery pliers and hooks from craft stores and online if you don’t have them.
Even if you’re not sensitive to metals you might like to try this. I find it more comfortable to wear earrings this size on hooks or clip-ons anyway.
You could definitely convert these to silver or surgical steel studs by cutting off the old post and glueing on a new one. The little loop on the bottom on the stud would be easy to break off too with jewellery pliers (these usually just cut off nice and cleanly).
Target had an amazing sale on jewellery this week (ie. 50% of everything!!!). It was my complete and utter luck too as they’ve just released a new range of neon jewellery! I LOVE neon jewellery. I go mad for it. My absolute favourite is neon with silver and crystals – and this new Target range is just that – neon silver crystals! (Target in Australia)
Unfortunately they didn’t have a great range of earrings though, and I’ve been looking for a nice pair of neon earrings for ages. As it was such a good sale I had my eyes open for a potential refashion – and I found something amazing!! I absolutely adored the charm on this neon bracelet. It wasn’t really enough of a statement for me to enjoy wearing as a bracelet, so why but two of them and make a pair of earrings?
All I basically did was glue an eye pin to the back of the charms with super glue. I cut the eye pin back so it was the same length as the charms – I’m sure it would be fine being shorter though. It feels super secure. I’ve never done this before so if it doesn’t work out I’ll let you know!
I could’ve done this without removing the backing metal poles. This step is totally optional. It’s so easy to break fashion jewellery though so don’t be scared to try (just be reasonably gentle).
These would be great as posts too – just glue a post finding on to the back instead of an eye pin.
For information about attaching hooks see this post. For information about making post earrings see this post.
I hope to write a guide to basic jewellery techniques and supplies soon. I also hope to start writing some posts about how I wear certain trends. I hope to do one about neon in the next couple of weeks
Have a lovely day :) I best be off and go love wearing my new earrings!
This is a belt that came with the a skirt I recently bought. It’s actually a really nice style and black patent leather which I love love love. Silver jewellery is my absolute favourite though, I wear it every day, so I’m going to change the belt to match my earrings and everything else!
I find using nail polish the easiest way to do this but you can use metallic markers or paint as well. It is really quick and easy to do whatever you choose!
Here’s the end result. I did three coats of silver and then two coats of clear to finish it off.
Buttons, buckles, clasps and jewellery etc etc can all be simple to change in this way.
You can use masking tape to protect the areas where you don’t want to get colour. Cotton buds dipped in nail polish remover are helpful to clean up if you do go over the edges.
It usually looks pretty good. I would only do this to cheaper accessories or ones that I was really confident would make a big improvement to.
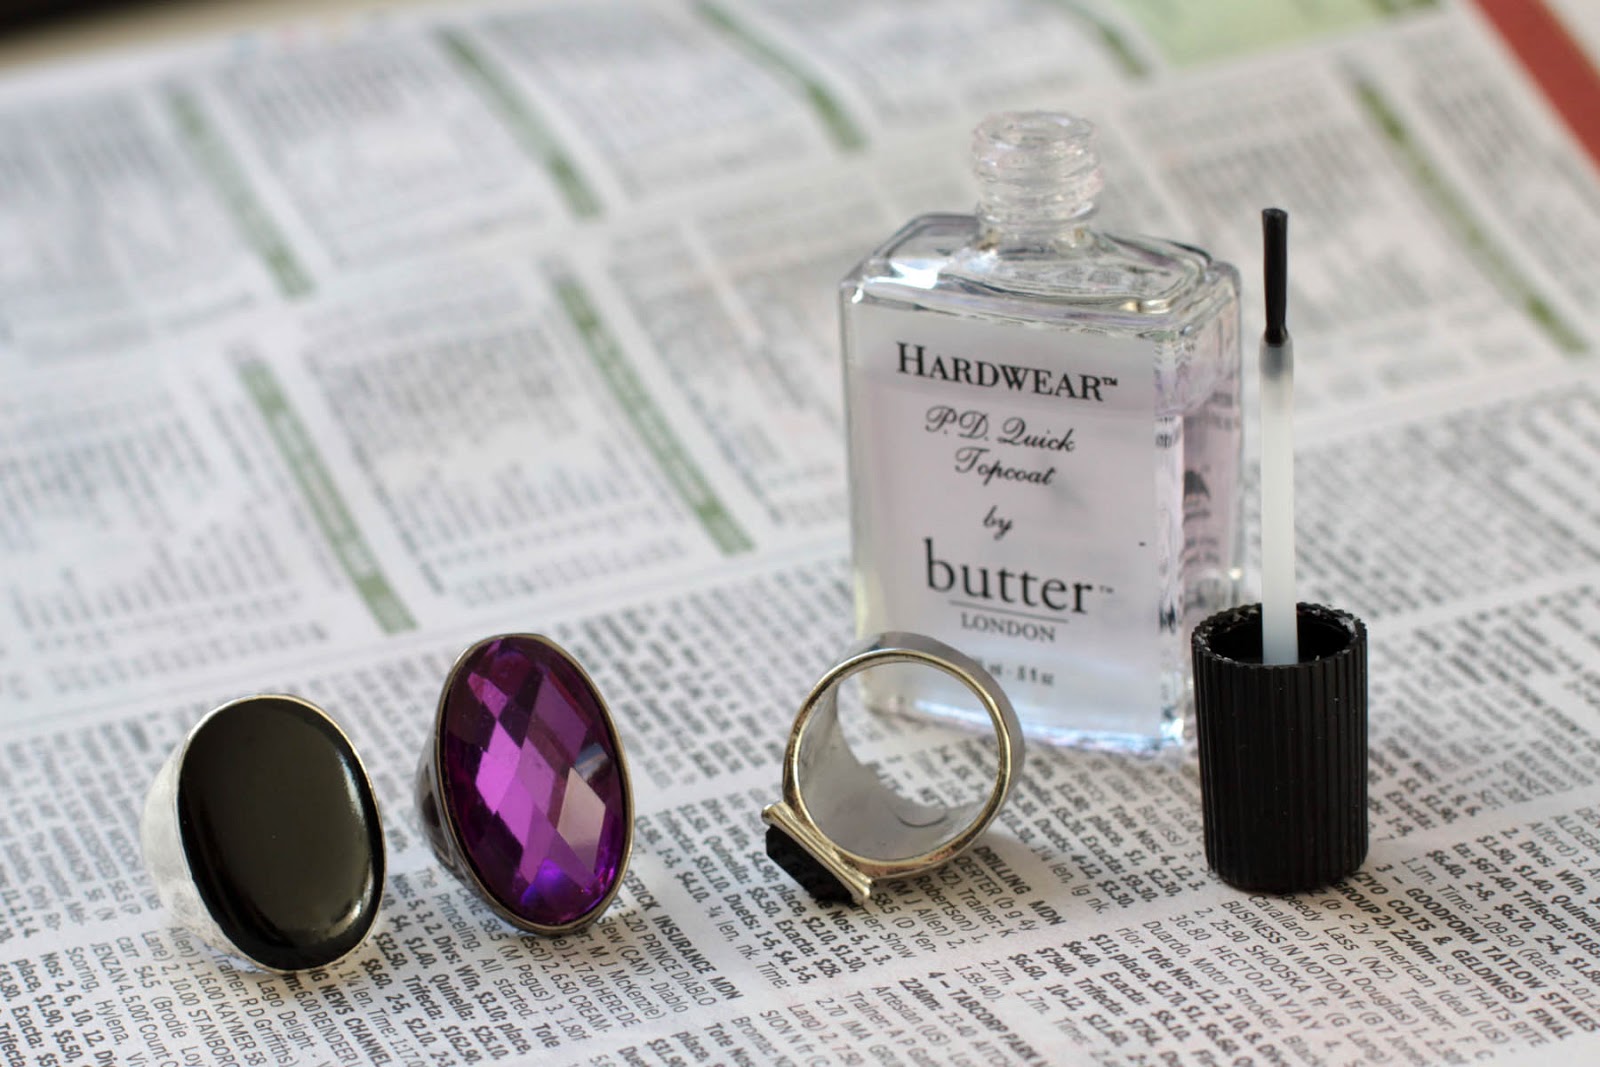
Here’s a quick refashion for the week.I’ve started painting the inside of my rings with clear nail polish. I’m not as sensitive to cheap rings as I am to cheap earrings but they can still bug me. I’ve found coating the inside of them with clear nail polish has helped a lot. This can help prevent your fingers turning green from the metal too!! It seems to last well – I haven’t needed to reapply it at all yet. I can’t imagine it damaging the jewellery in anyway (in fact it seems to stop the metal discolouring too).
There is also a specially formulated paint available to help with jewellery sensitivity called Reaction Block. I’m not sure if it’s available from stores yet but you can order it online at the Earring Doctor. I’ve never tried it myself but from what I’ve heard it is somewhat similar to clear nail polish.
I’ve been delaying this post as it’s a little bit awkward. It is very possible to convert cheaper studs to sterling silver or surgical steel posts but the method is kind of messy and will vary on the type, size and metal of the stud. Here are some ideas anyway – hope this can be of some help. If you’ve got any ideas or do this yourself please let me know all about it! I would really like to work out how to do this better!
You will need: Cheap Earring Studs, Pliers (jewellery pliers or normal pliers), Glue (I recommend Ultimate Glue by Crafter’s Pick as it’s a non-toxic, water-soluble superglue but E6000, Araldite, Superglue or Gluegun will all work fine), Quality metal earring posts, Newspaper.
Here is the easiest, less messy method. It involves using studs that don’t mind which way up you wear them.
1. Get your studs ready to work on. See that bump under the post? That’s the annoying part but we can avoid it with these earrings thankfully.
2. Cut back the post with pliers. Cut down as far as you possibly can. You will most likely end up with a sharp point of metal.
3. There are a few ways you can get rid of the point – sanding it back with a heavy duty metal file, covering it with glue, ripping it off (only works on weaker metals, be careful doing this too) and pressing it flat. In this example I’m pressing it flat with the pliers – this is easy on these studs as I can grip the metal rim. On more delicate studs I wouldn’t do this.
4. This is as flat as I can get them.
5. The remaining bump was still a little sharp so I covered it with a dab of glue. I glued the stud to the flat surface at the top of the earring.
Now this pair of earrings are slightly trickier as it does matter (sort of) which way up you wear them.
As these ones were bigger I was able to twist off the post with the pliers. This method usually takes more of the metal off.
This is what I ended up with. You can’t do much about this bump under the post. Unfortunately this is on most earrings and makes it tricky to glue a new stud on.
You can try filing it back a bit – be careful doing this though! Wear googles and work outside as metal dust can be nasty! This didn’t work for me this time as the metal was too strong.
Now
1. Cover the bump with a lot of glue.
2. Place studs on.
3. Make sure the glue covers the entire surface of the new stud – I probably could have put more on here.
When the glue is dry you can cover it with nail polish to match the metal.
These are ok. I find they do poke out a bit – It would be great if I could remove that bump! Any suggestions?
For Round Studs:
You can find cup/cone shaped studs to glue onto round stud earrings. I’m yet to try this (Maybe these would glue better over the bump in the previous earrings???) These are super easy to convert straight to hooks though. I did a tutorial here
A final suggestion:
You can always try painting the post with clear nail polish to seal the metal. You will probably need to apply this fairly often. I’m still bothered by earrings when I do this though. You can also buy a metal protectant specifically designed for this. The Earring Doctor sells it. I’ve never seen it in shops. I’m yet to try it but I’ve heard it’s similar to clear nail polish.
Posts are easily available from most craft shops, online jewellery supply stores and ebay too (there are some links to these sites in my links tab). You can get them in a range of different sizes and styles. The posts will hold better when you match them to the size and weight of the earring. I buy surgical steel as it’s cheap but you can also purchase sterling silver and gold filled posts but these tend to be a lot more expensive (much more expensive than silver/gold hooks). I pay about $2 for 12 pairs of surgical steel.
Have fun. I hope this helps and opens up a few more earring options for you!